With a circle shear you will be able cut your own metal circles to whatever size or quantity you need:
I consider a circle shear as important as a spinning lathe to the serious metal spinner. Many wannabe metal spinners (people who want to learn to spin metal) have contacted me indicating that they can not find or afford a circle shear. This homemade circle shear might be of use to those with rather limited budgets. It was constructed from a Harbor Freight beading tool. These are on sale every now and then for around $100.
In order to make this shear, the spinner must have access to several machine tools and welding equipment. In addition to access to these items, the skill to use them is, of course, needed. Every city of any size has local machinist clubs. Members of these clubs might be willing to assist in making this shear.
Note: I am not providing measured drawings. If you want to make this, you will be able to figure out the dimensions. The only thing critical is that the two pinch bearings line up perfectly. Please do not email me asking for measurements.
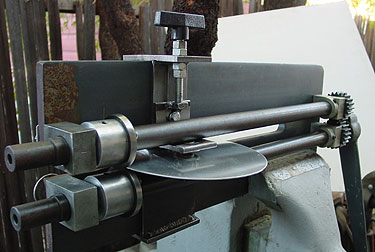
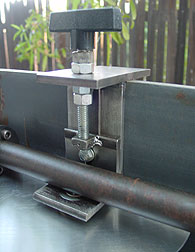
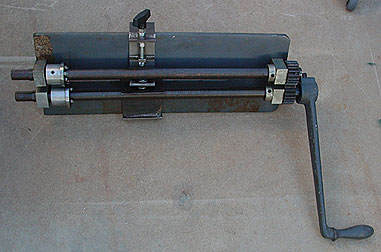
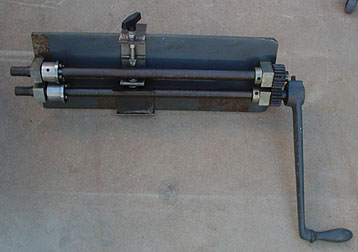 This is what the
Riser Circle Shear looks like. It gets clamped in a sturdy
vise.
This is what the
Riser Circle Shear looks like. It gets clamped in a sturdy
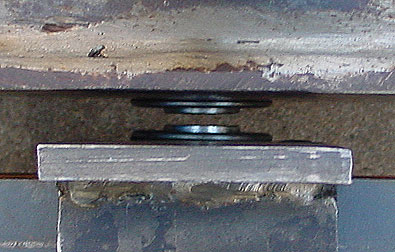
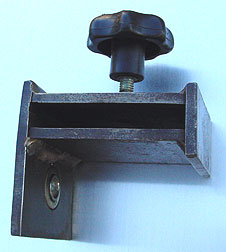
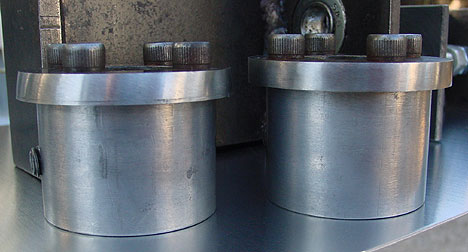
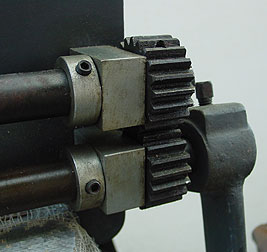
vise.A critical part of any circle shear is the pinching mechanism. This holds the metal securely as it is being cut. To conserve shop space and recognizing that most metal spinners would not require large discs for spinning, I designed this shear to hold the metal within the large "U" of the original tool. This choice requires two opposite and matching pinching adaptors. The top one (shown below) is made to be the adjustable adaptor. This part screws down to pinch the metal against the bottom pivot bearing. The bearing is an inexpensive shouldered ball bearing. The flat handle controls the bearing height. The large knob locks the adaptor in position on the "U" frame. It merely slides into the required position and is locked there.
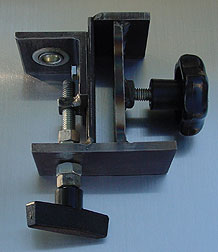

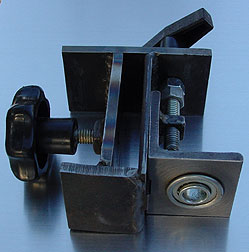

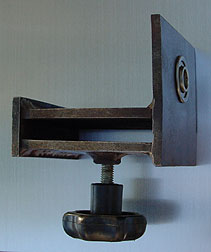
The bottom pinching adaptor is shown here. Basically it merely slides into position perfectly aligned below the top adjustable adaptor.

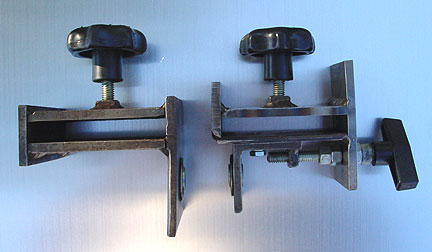
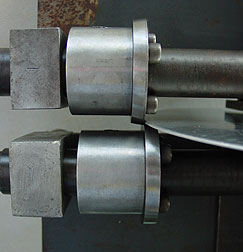
Each of these adaptors requires a machined "T" pad (not shown) to plug into the bearing. The tops of these pads are covered with thin rubber sheet or leather. This securely grips the metal without scratching it. Shown below are the opposing pinch adaptors.
The original blades must be machined or ground as shown here. The bottom cutter blade supports the metal as it is being cut. The top cutter is angled to allow required clearance - especially on smaller circles.
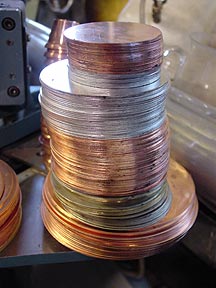
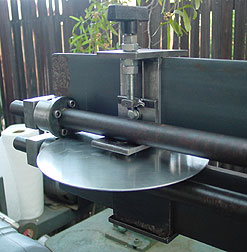
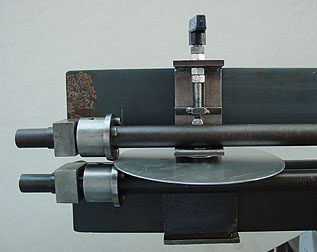
In action, the Riser Circle Shear looks like this. Shown here is a 9" disc being cut.
The shear is powered by a hand crank and matching gears.
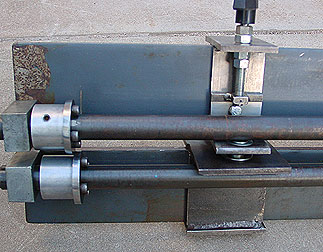
Notice in the image below that the screw mechanism which raises and lowers the blades is not there. It needed to be ground off in order to slide on the pinching adaptors. I will replace it with a bolt on mechanism which can be removed if desired.
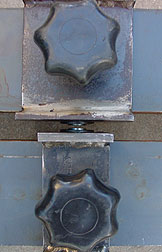
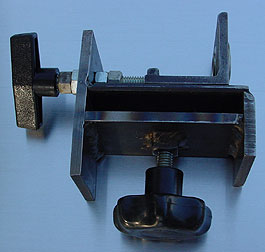
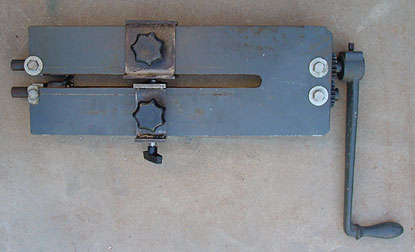
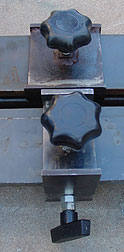
Here is a view of the back of the shear showing the knobs for locking the pinch adaptors in position.
Here is how the bearings line up. The thin "T" pads are not shown.