Background:
It is possible to spin more than one profile from the same metal spinning chuck. In this segment on the art of metal spinning I shall explain how to get an assortment of profiles from the same spinning chuck, as well as, showing the spinning process itself.
The chuck:
The chuck for this example is turned from cold rolled steel. It has a removable plug-in end piece which allows additional spinning opportunities. A hardwood chuck could be used.

The follow block is turned from hardwood and plugs onto a tailstock center extension.
Getting started:
After making the steel chuck, the first thing to do is to calculate the diameter needed and to cut the metal circle for spinning. Click here to see how I cut my sheet metal into circles.
Centering the circle of metal:
You will next need to mount and center the circle in the lathe. To do this the circle is approximately centered by hand and the tailstock brought up to hold the disc of metal in place as the lathe is started. A board is held under the rotating disc and levered up as the tailstock is slightly released. The board is raised until the disc runs true. The tailstock is then locked into position.
![]()
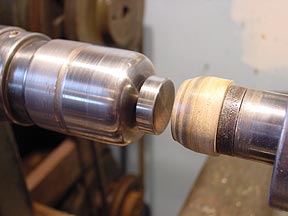
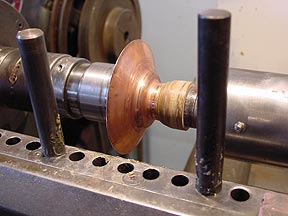
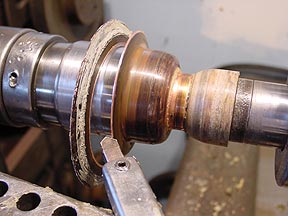
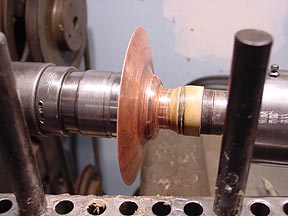
On the steel chuck that we will be using for this example, it will look like this. Do not stand directly in line with the spinning metal disc at this stage. Note: The disc could slip from between the chuck and follow block causing injury!
Locking on:
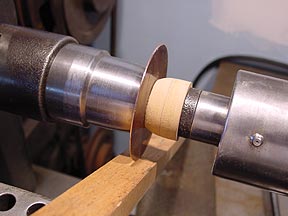
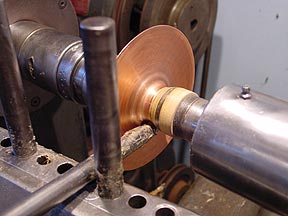
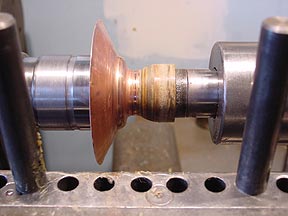
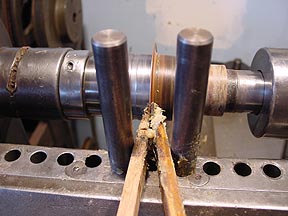
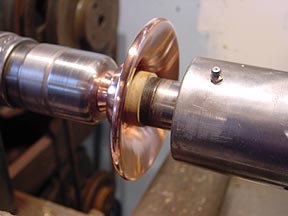
As soon as the disc is centered, it must be lubricated and "locked" on to the chuck to keep it from flying out of the lathe. Locking on is nothing more than spinning the center of the metal circle to the end of the chuck. These two images illustrate this process. The material on the spinning tool is lubricant. For this example I am shown using a pointed tool to begin the spinning.
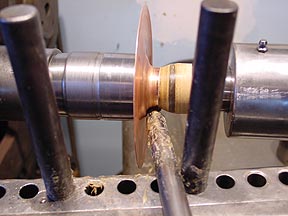
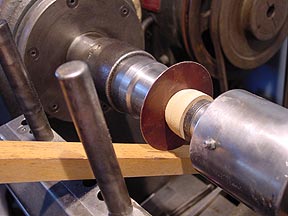
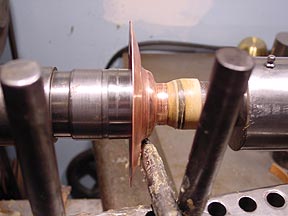
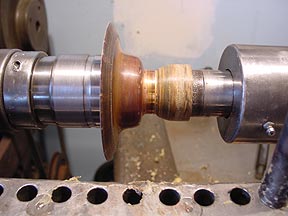
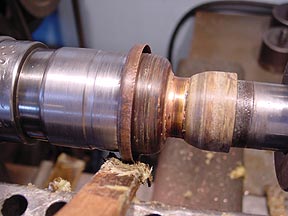
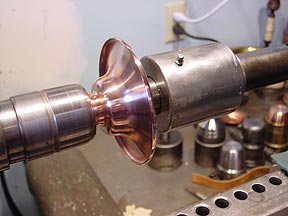
Here are shown additional images of spinning to the chuck. You can easily see how the metal has begun to flow over the steel chuck. Tool movement must be continuous and in a back and forth motion from the center towards the rim - then from the rim towards the center. If you only move the tool from the center towards the rim, the metal will thin and break through.
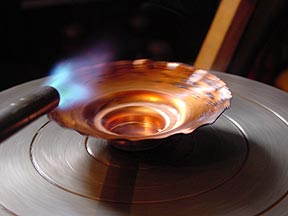
At this point, the copper will show resistance to forming. It needs to be annealed or softened. If this is not done, the work hardened metal will stretch out, become brittle, and break from the spun base.
Annealing copper:
Click here to see the annealing process and equipment. After annealing the metal, it will be coated with a black oxide. This must be removed before spinning can resume. If the oxide is not removed, it will be pressed into the surface of the metal being spun. This will make obtaining a nice finish on the completed spinning very difficult. The easiest way to remove the oxidation is by soaking the metal in a weak acid solution. Before going into the acid solution, the surface of the metal will be black. After an acid cleaning, the metal will look like this.
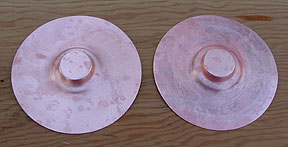
The spinning on the left was soaked longer than the one on the right.
Problems:
As a beginner, you might find the metal edge of your spinning to be wrinkling up due to rushing the job. If this begins to happen, stop spinning. Anneal the spinning - wrinkles and all - as shown here.
After the annealing and if things have not gotten too wrinkled, you will be able to smooth out the wrinkles by using a pair of lubricated hardwood backsticks. The metal is smoothed between the tips of the sticks as shown here. Spinning may then resume.
Variations in the final shape:
From this stage in the spinning, many variations in the final profile are possible.
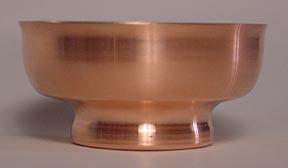
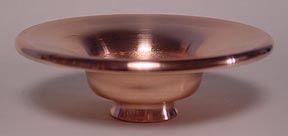
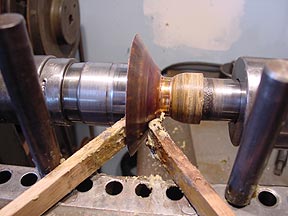
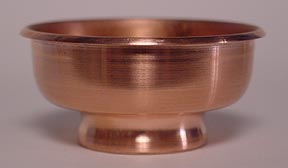
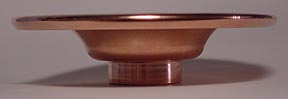
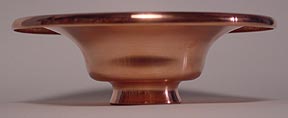
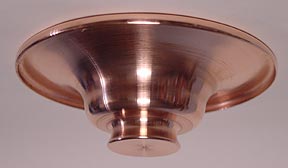
You could merely trim the excess off and end up with a bowl like this.
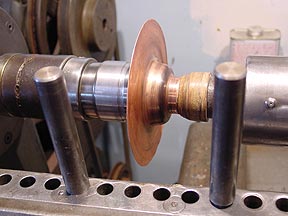
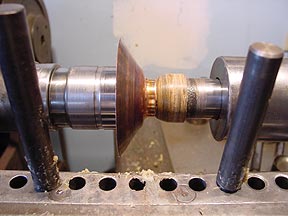
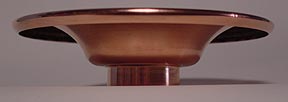
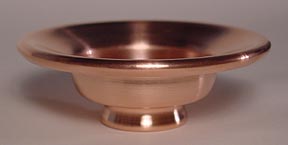
It should be noted that the foot on this bowl has been spun in to make it more visually appealing. This was done by removing the plug-in end piece of the steel chuck. The shell being spun was then placed back on the remainder of the chuck and the foot spun in to the reduced diameter seen here. This spinning was done with a point tool.
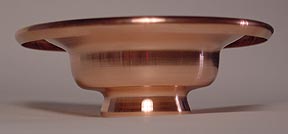
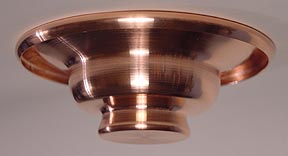
 Another variation with a rolled lip is seen here.
Below are shown the steps to creating a rolled edge. The excess is first trimmed from the shell. The rim is perfectly straightened by using two hardwood backsticks.

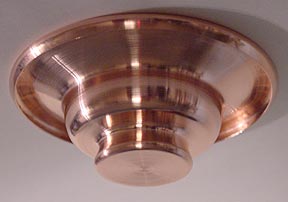
Additional variations:


Finishing the spinnings:
Most spinnings are partially finished while still on the lathe. If your follow block is made correctly, it is often possible to turn the spinning backwards to smooth out the interior as shown below.
Summary:
The above images and technique information should be enough to get you started on your own metal spinnings.