Adapting a Chinese Milling Head to a Classic WW Lathe
Copyright 2008 by James P. Riser
I have wanted to set up one of my WW lathes for drilling lantern
pinions and have been trying to purchase an old WW lathe milling
attachment with no luck. Every one of the milling heads I located
was way too expensive for the budget alloted to this project.
I had seen the Chinese made milling heads advertised and figured
I could at least use some of the parts from one for my needs.
I had, of course, read all of the negative posts about these items
- all written by guys who have never handled one of the units.
I like good old "American Iron" and my shop is full
of it but I will also use anything else that will get the job
done at the right price. So, I decided to try one of the little
Chinese milling heads.
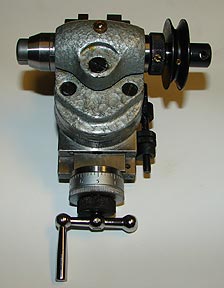
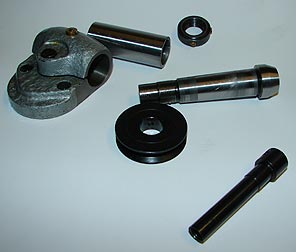
The units look like this. The paint job leaves a lot
to be desired but the construction is not bad.
Having read the reports that the items were filled
with grit and poorly machined, I first of all disassembled the
unit to examine and clean it carefully.
 No grit was found
anywhere and construction was good.
No grit was found
anywhere and construction was good. 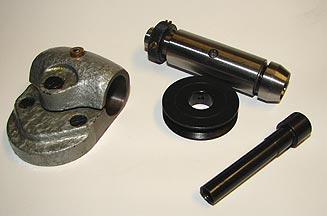
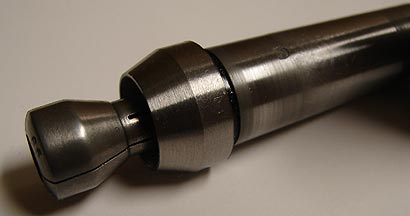
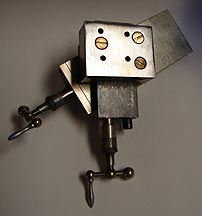
 The spindle is one long taper which turns inside of
a matching barrel.
This is an acceptable and previously used design for
such a unit.
The work and fit on everything was found to be acceptable.
The spindle is one long taper which turns inside of
a matching barrel.
This is an acceptable and previously used design for
such a unit.
The work and fit on everything was found to be acceptable.
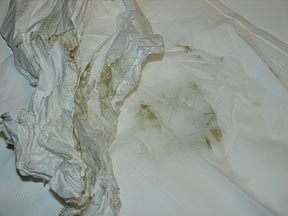 Cleaning everything with tissue would show up any grit
or metal shavings - if there were any.
As can be seen, all that whiped off of the unit innards
was oil and cosmoline.
No grit nor metal shavings.
The next concern was whether the unit would accept
the assortment of WW collets/wire chucks etc. that I already own.
Cleaning everything with tissue would show up any grit
or metal shavings - if there were any.
As can be seen, all that whiped off of the unit innards
was oil and cosmoline.
No grit nor metal shavings.
The next concern was whether the unit would accept
the assortment of WW collets/wire chucks etc. that I already own.
 Shown here is a
Moseley collet which will not fit the spindle of the unit.
The problem is the collet key or pin. It is too large
in diameter to allow my collets to enter the spindle.
Shown here is a
Moseley collet which will not fit the spindle of the unit.
The problem is the collet key or pin. It is too large
in diameter to allow my collets to enter the spindle. 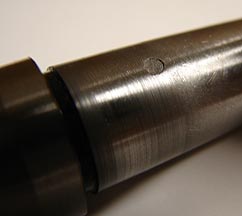
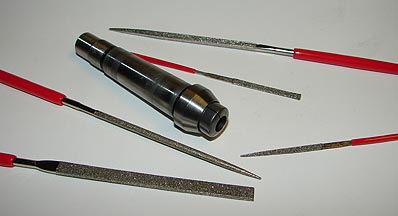 So, a little modification
to this pin with an assortment of diamond files did the job.
So, a little modification
to this pin with an assortment of diamond files did the job.
All of my collets from various makers will now fit the new
milling head spindle. The next problem was that the draw tube
for the collets would not fit the ends of my collets. This was
an easy fix.
The draw tube end was rethreaded with a .275"
- 40 tpi tap. 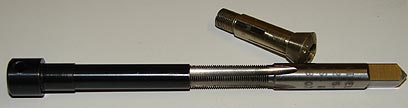
 This image shows the metal flakes removed from the
draw tube after tapping it.
This is the sort of grit and metal shavings I had been
told would be seen throughout the unit - not so.
The unit was clean.
This image shows the metal flakes removed from the
draw tube after tapping it.
This is the sort of grit and metal shavings I had been
told would be seen throughout the unit - not so.
The unit was clean.
After rethreading, the collet easily goes fully into
the spindle of the unit and locks in place. 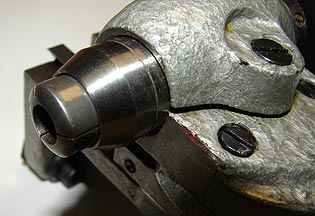
 Moseley collets
are longer than other brands and there is this gap on the draw
tube.
This modified unit now accepts all of the various collets
and cutter arbors etc. that I have.
Standard practice is to make a brass washer to fill
in this gap. Since I planned to use this unit with index plates
and non Moseley collets anyway, I did not worry about the gap
at this time.
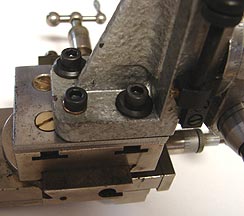
The next concern was how to mount the new milling head
on to an old two way slide rest. This slide had been modified
by a previous owner but would still work for my needs as a base
for the milling head.
Moseley collets
are longer than other brands and there is this gap on the draw
tube.
This modified unit now accepts all of the various collets
and cutter arbors etc. that I have.
Standard practice is to make a brass washer to fill
in this gap. Since I planned to use this unit with index plates
and non Moseley collets anyway, I did not worry about the gap
at this time.
The next concern was how to mount the new milling head
on to an old two way slide rest. This slide had been modified
by a previous owner but would still work for my needs as a base
for the milling head.
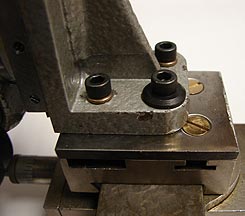
 Notice the milled
out slot.
Notice the milled
out slot. 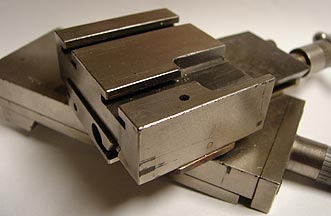 I decided to make a steel mounting plate to solve the
problem of holes on the milling head not matching up with the
slots on the slide rest.
Here the steel plate is being cut to size.
I decided to make a steel mounting plate to solve the
problem of holes on the milling head not matching up with the
slots on the slide rest.
Here the steel plate is being cut to size. 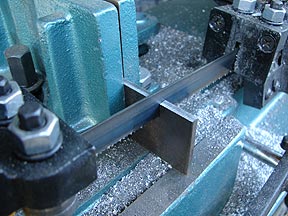
 The steel plate
tried for size.
The steel plate
tried for size. 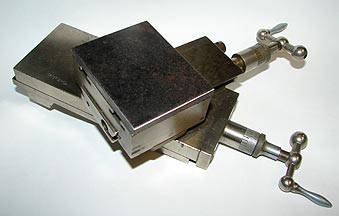 The three T-nuts in position in the slots.
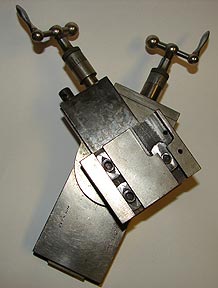
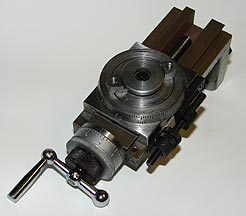
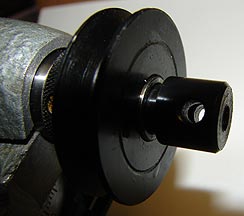
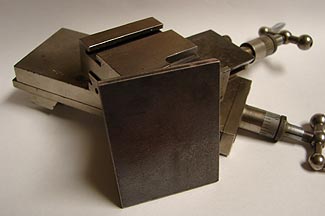
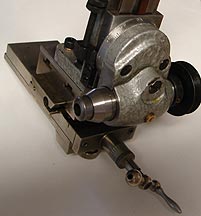
 The steel plate
in position. The new milling head mounts on the 4 threaded holes.
Here is everything bolted together...
The steel plate
in position. The new milling head mounts on the 4 threaded holes.
Here is everything bolted together...
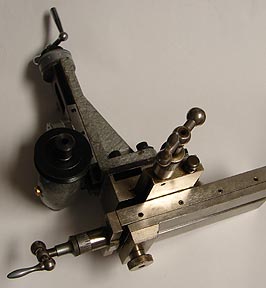
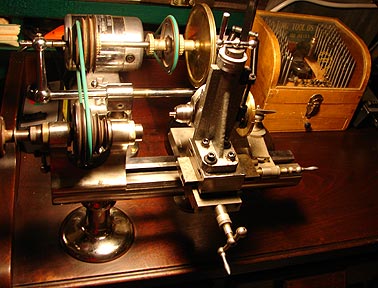
 ... and mounted
on a WW lathe.
... and mounted
on a WW lathe. 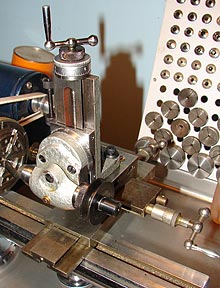 In part two I will show the making of the index plates
for using the milling head to drill lantern pinions.
Click here to go to part two.
In part two I will show the making of the index plates
for using the milling head to drill lantern pinions.
Click here to go to part two.