The Making of the Riser Ultimate Chop Cups
The "Riser Shorty" and the "Riser Tall"
Copyright 2004 by James
P. Riser
Shown here is the method that I use to make a basic
steel chuck for spinning a metal goblet shape. I prefer to utilize
steel chucks so that I might hold close tolerances on my metal
spinnings and so that the chuck will last a lifetime.
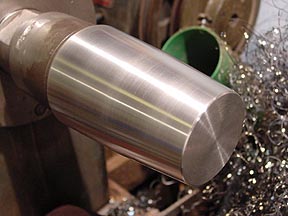
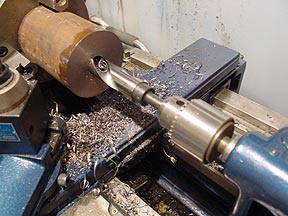 The piece of steel to be turned into the chuck is mounted
on my Sheldon metal lathe for the preliminary steps in the process.
After squaring off the end, a hole is drilled into this end. A
series of drills are used to slowly enlarge the hole up to the
size to be threaded 1" - 8 threads per inch.
This size is desired in order to mount the eventual
chuck on to an existing adapter.
The piece of steel to be turned into the chuck is mounted
on my Sheldon metal lathe for the preliminary steps in the process.
After squaring off the end, a hole is drilled into this end. A
series of drills are used to slowly enlarge the hole up to the
size to be threaded 1" - 8 threads per inch.
This size is desired in order to mount the eventual
chuck on to an existing adapter.
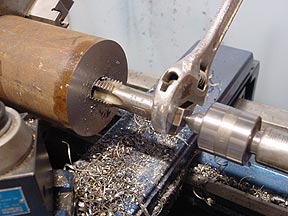 After drilling to the proper diameter and depth, the
hole is thread on the lathe using a large tap.
This assures a good straight thread in the chuck.
This is critical as the chuck must run true for successful
metal spinning.
Cutting oil is used during this process.
After drilling to the proper diameter and depth, the
hole is thread on the lathe using a large tap.
This assures a good straight thread in the chuck.
This is critical as the chuck must run true for successful
metal spinning.
Cutting oil is used during this process.
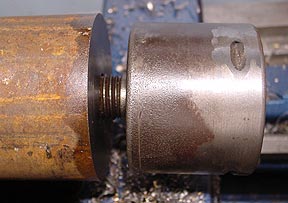 Shown here is the old adapter being test threaded into
the future spinning chuck
to test the size and depth of the threads.
Shown here is the old adapter being test threaded into
the future spinning chuck
to test the size and depth of the threads.
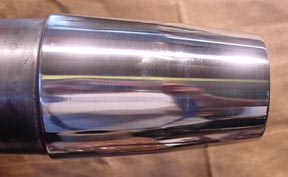
 Here the adapter is shown completely threaded into
the chuck blank.
The chuck is now transferred to my Haag spinning lathe
for final shaping and truing.
Here the adapter is shown completely threaded into
the chuck blank.
The chuck is now transferred to my Haag spinning lathe
for final shaping and truing.
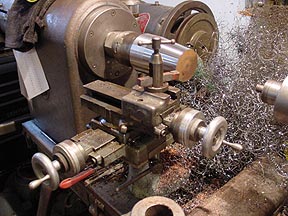 My spinning lathe
came equipped with a crossslide for making steel chucks.
A rather large pile of steel shavings is produced during
this process.
My spinning lathe
came equipped with a crossslide for making steel chucks.
A rather large pile of steel shavings is produced during
this process.
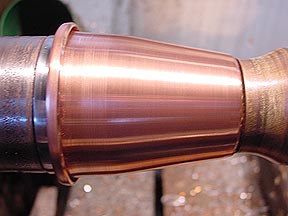
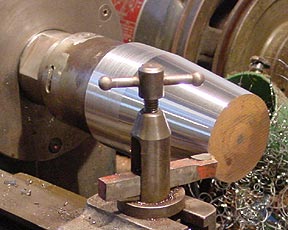 Finishing cuts
to the large taper are being cut.
Finishing cuts
to the large taper are being cut. 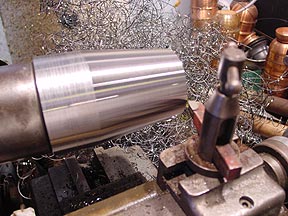
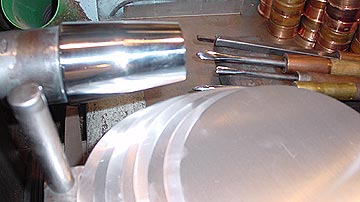
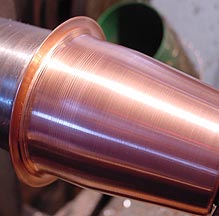
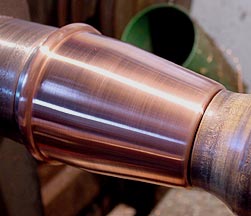
 The whole chuck
is smoothed with oil and sanding cloth.
The whole chuck
is smoothed with oil and sanding cloth. 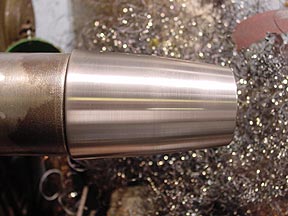 It looks like this prior to the final buffing.
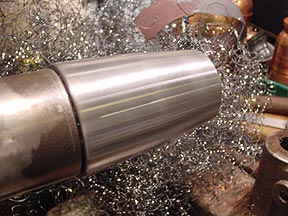
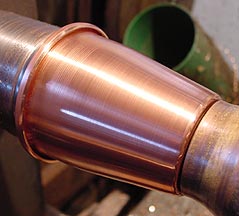
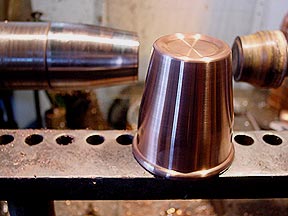
 After buffing, the
completed chuck looks like this.
After buffing, the
completed chuck looks like this. 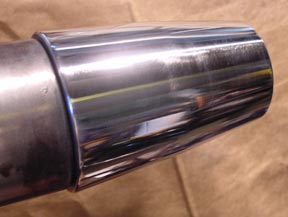
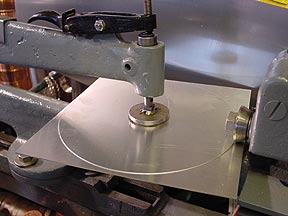 The next step is
to cut the circles for spinning.
Now everything is ready to spin!
The next step is
to cut the circles for spinning.
Now everything is ready to spin!
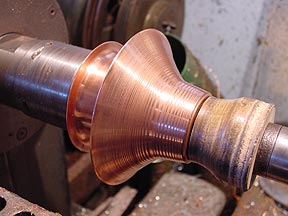
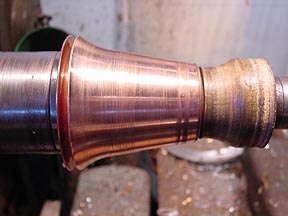
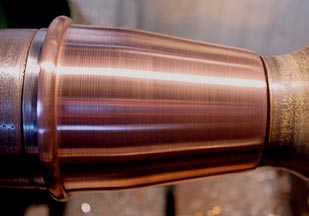
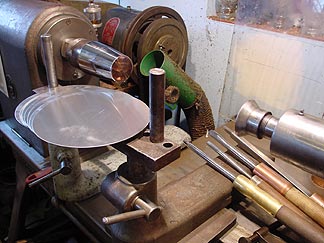 Shown here on the "Riser Tall" is
the spinning of the second layer of metal over the first.
Shown here on the "Riser Tall" is
the spinning of the second layer of metal over the first. 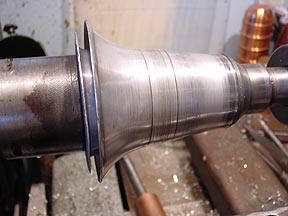 This casing of the base cup is shown here on the "Riser
Shorty".
This process makes the magnet assembly totally invisible
upon examination of either cup.
This casing of the base cup is shown here on the "Riser
Shorty".
This process makes the magnet assembly totally invisible
upon examination of either cup.
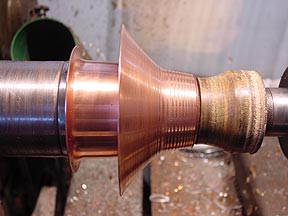
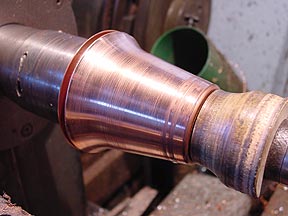
 This outer layer of metal is carefully spun down to
the base layer. The "stuff" on the cups is spinning
lubricant.
This outer layer of metal is carefully spun down to
the base layer. The "stuff" on the cups is spinning
lubricant.
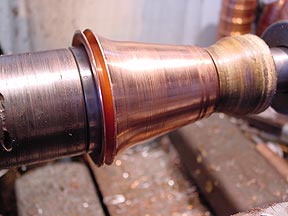
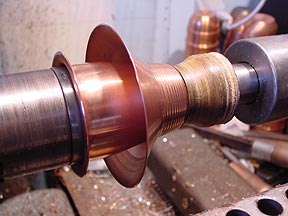
 A small "flange" is formed at the rim of
this second layer of metal. This flange will be gripped by the
bead to hold everything together securely.
A small "flange" is formed at the rim of
this second layer of metal. This flange will be gripped by the
bead to hold everything together securely.
 Here is shown the bead being formed over this flange.
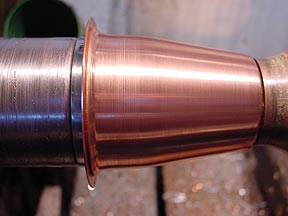
 And the bead is completed to seal everything tightly.
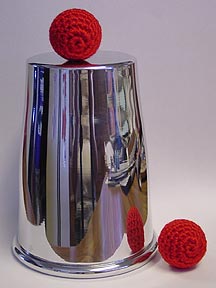
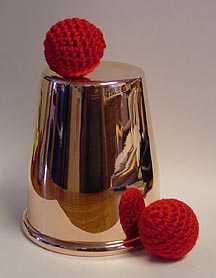
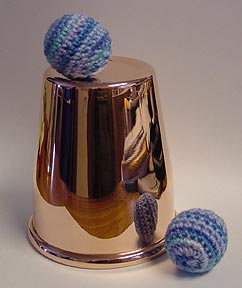
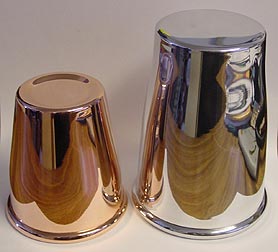
 The finished cups. The Riser Shorty is designed
to deliver a tennis ball as a final load. The Riser Tall
delivers a full sized baseball.
The finished cups. The Riser Shorty is designed
to deliver a tennis ball as a final load. The Riser Tall
delivers a full sized baseball.
 Click here to
return to my main magic web page.
Click here to
return to my main magic web page.