Dial Engraving Accessory ...
Copyright 2015 by James P. Riser
This unusual Dial Engraving Accessory is the latest
addition to my Gorton 3U pantograph restoration. This accessory
allows precise engraving of flat dials or partial dials. As I
am gearing up to make a small tower clock, I can utilize this
to create the clock dials. The pictures below illustrate the accessory.
Since it fits right onto my Gorton 3U, I am assuming that it was
made by Gorton.
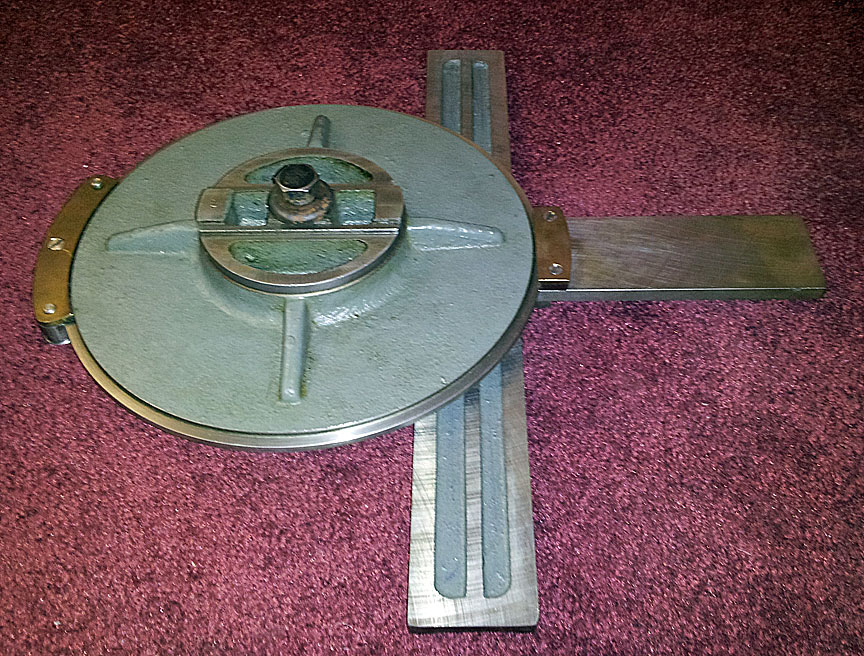
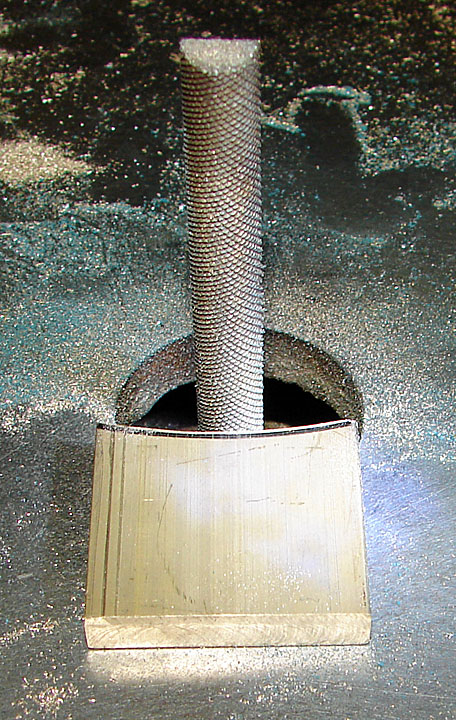
This is a view of the underside of the accessory showing
the standard mounting as seen on Gorton pantographs.
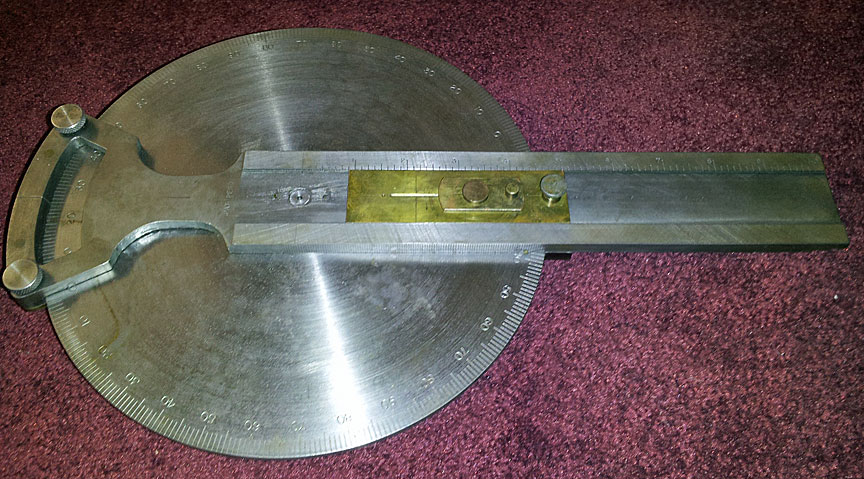
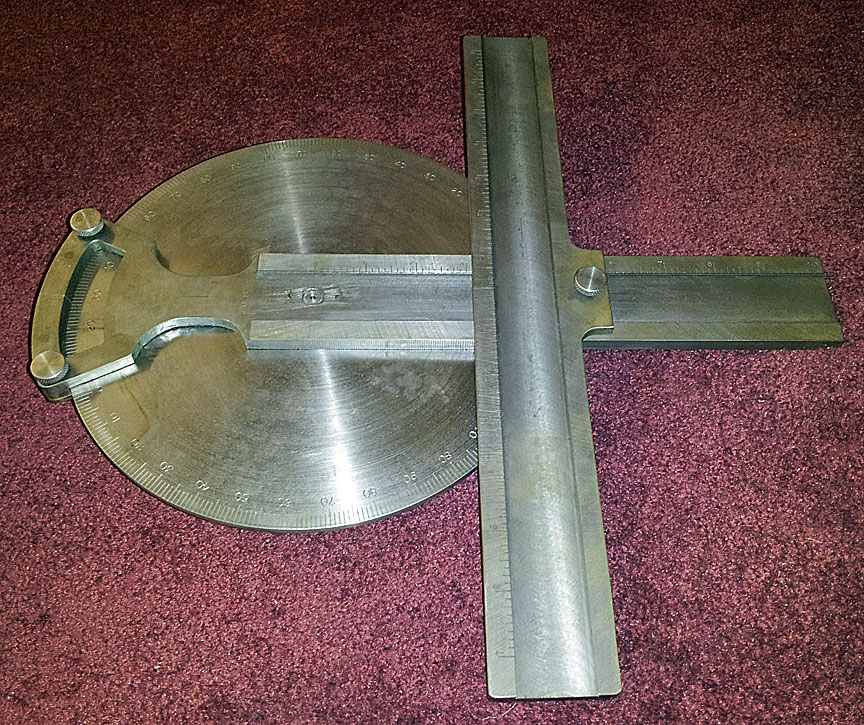
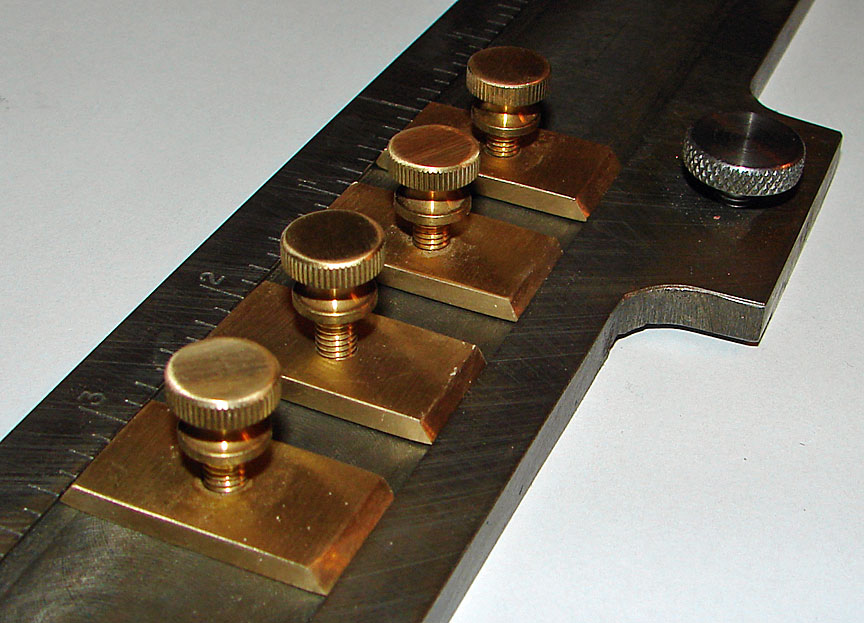
 The top side looks like this.
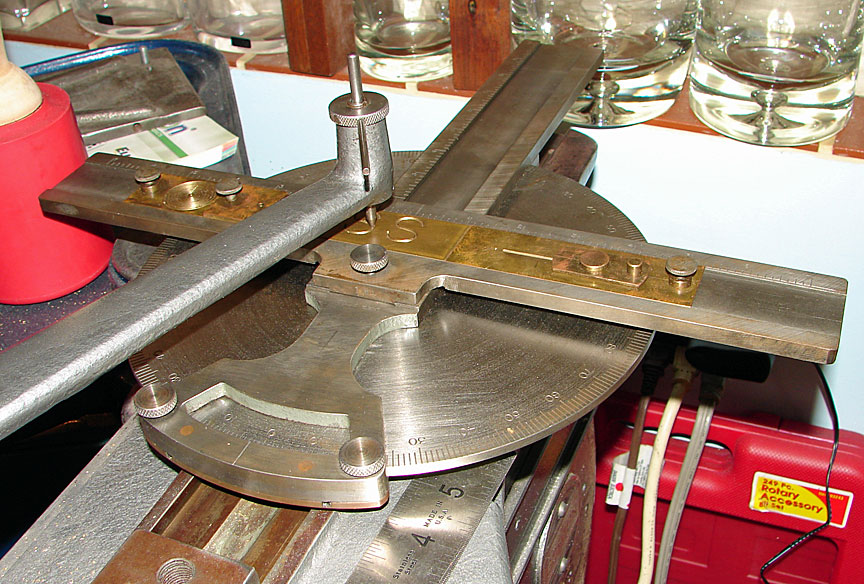
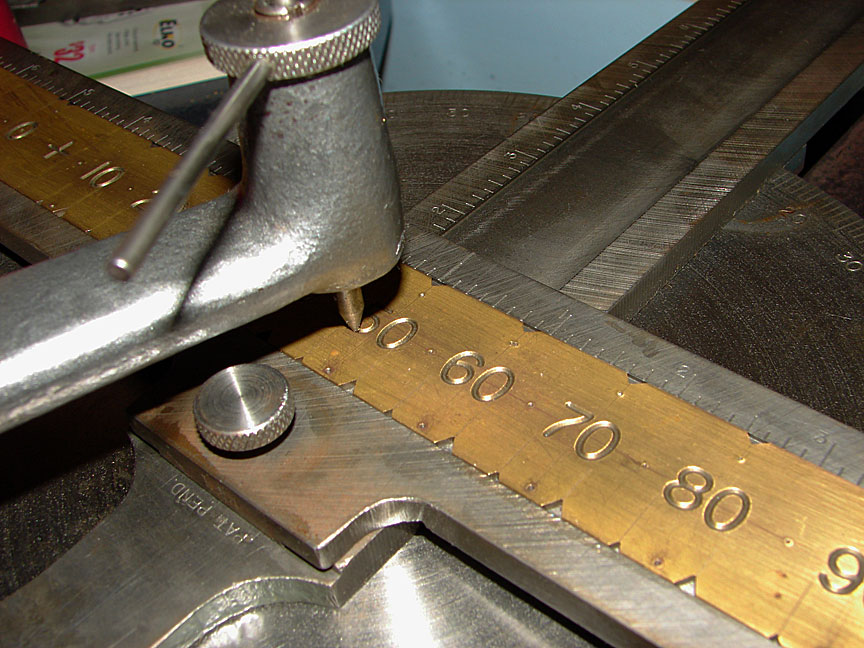
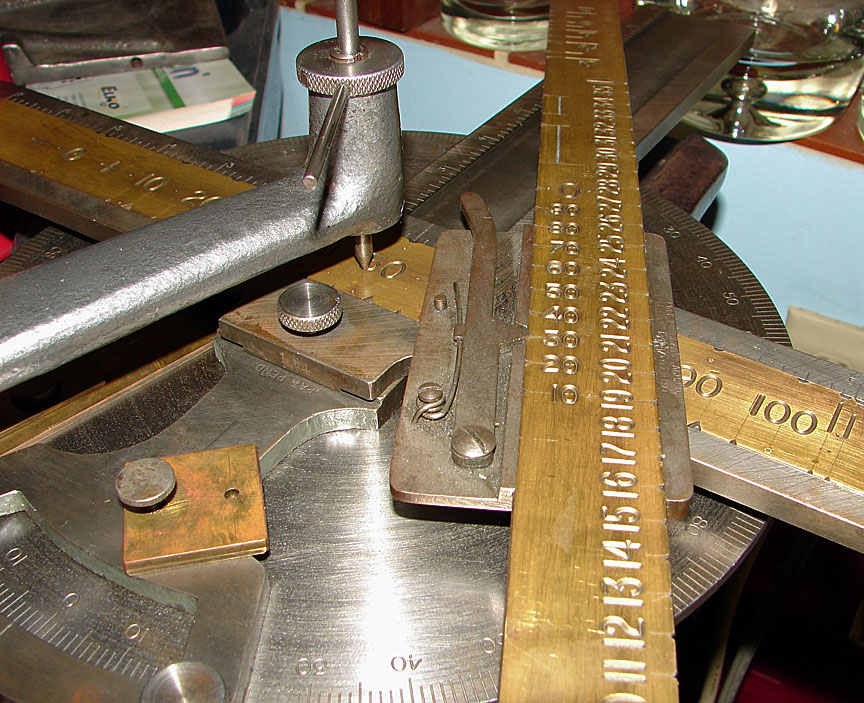
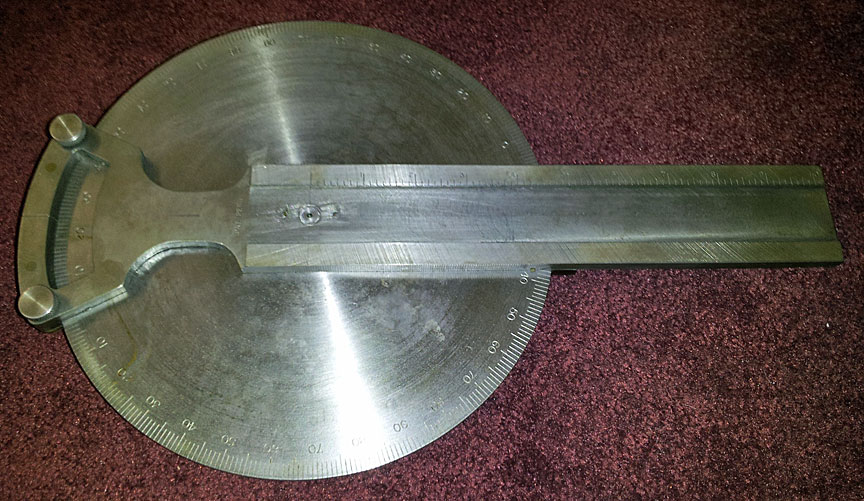 Notice that the dial is marked off in degrees and pivots
around a center point. The two thumb screws at the left can secure
the dial at any desired degree. Half degrees can be clearly estimated.
The long arm is marked off in inches.
The recessed slot on the long arm holds commonly sized
1 1/4" engravers type. In addition, the circle engraving
locking brass fitting can be slid along the arm. The stylus point
can be plugged into the brass fitting and the arm swung around
to engrave circles - even concentric circles.
Notice that the dial is marked off in degrees and pivots
around a center point. The two thumb screws at the left can secure
the dial at any desired degree. Half degrees can be clearly estimated.
The long arm is marked off in inches.
The recessed slot on the long arm holds commonly sized
1 1/4" engravers type. In addition, the circle engraving
locking brass fitting can be slid along the arm. The stylus point
can be plugged into the brass fitting and the arm swung around
to engrave circles - even concentric circles.
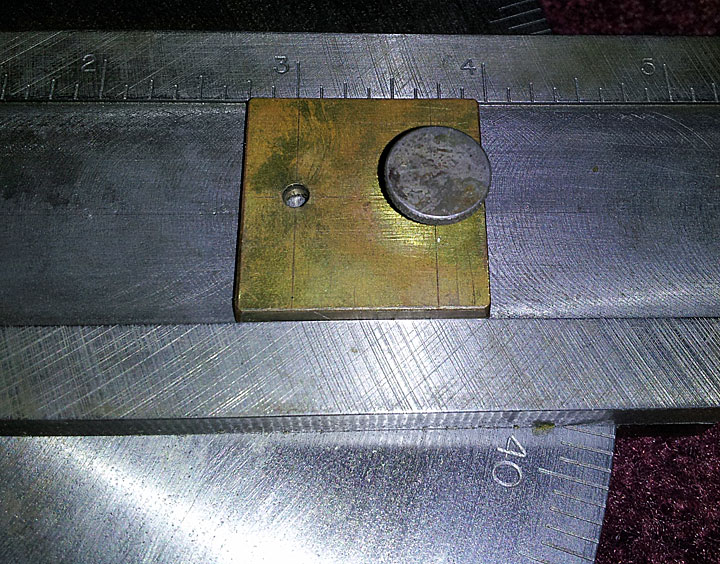
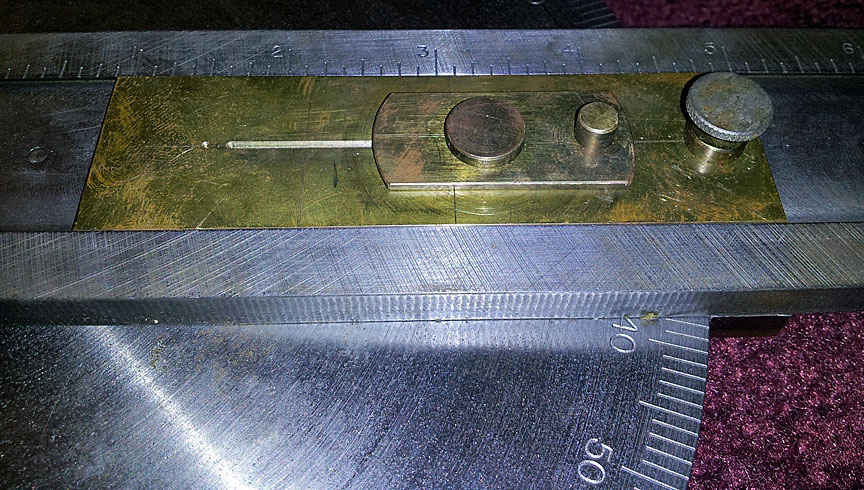
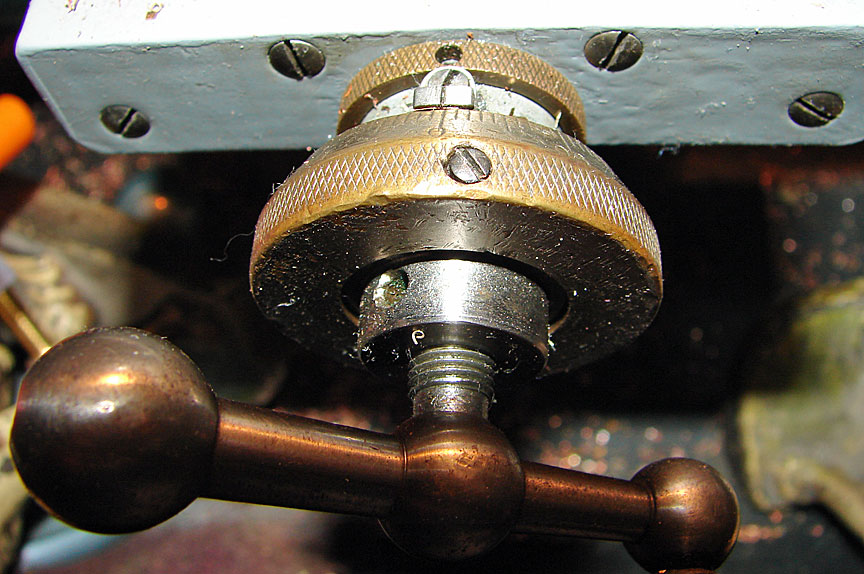
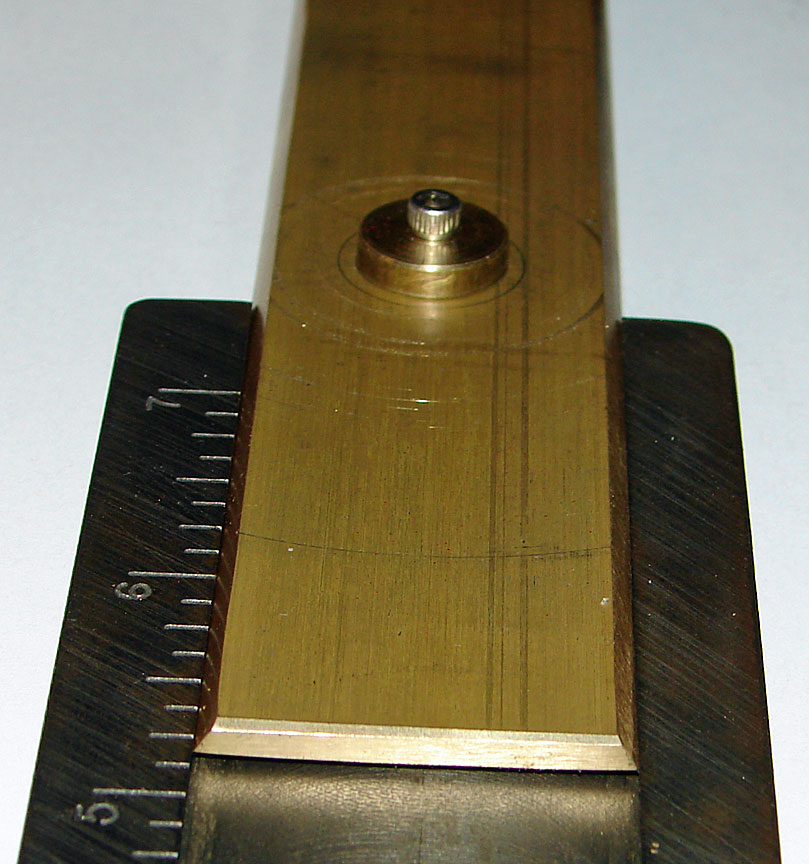
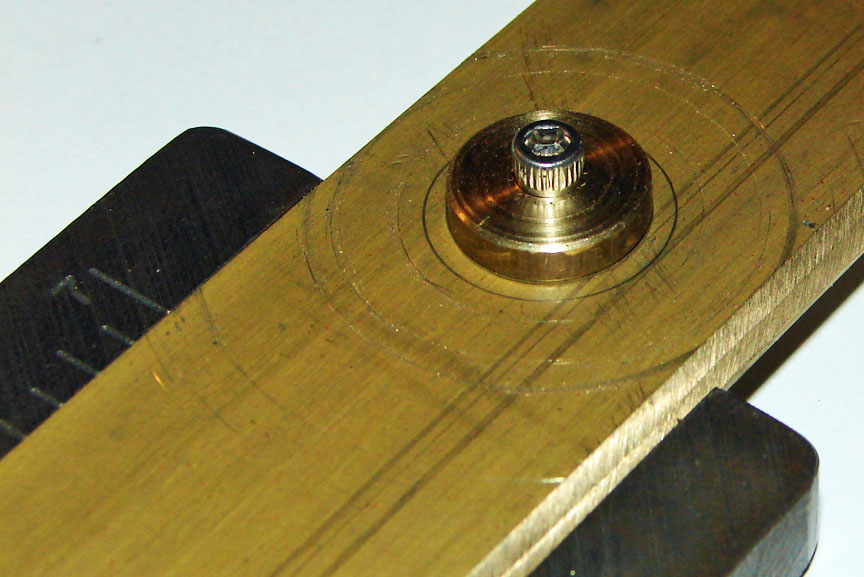
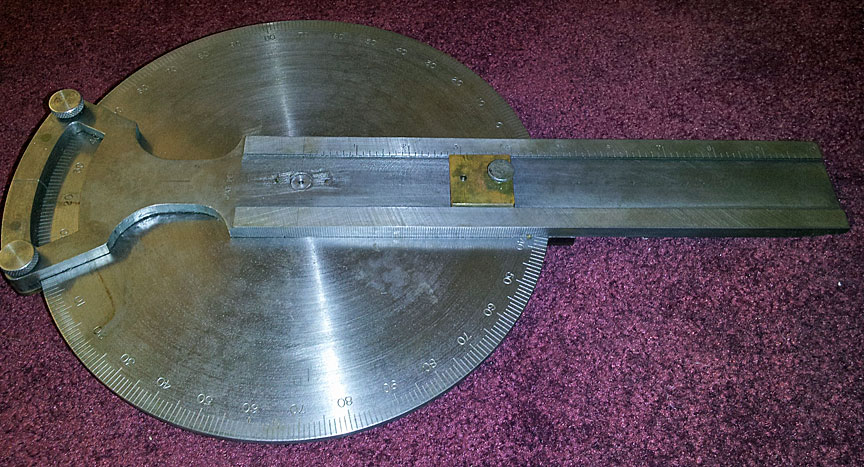 Here is a close up of this brass fitting.
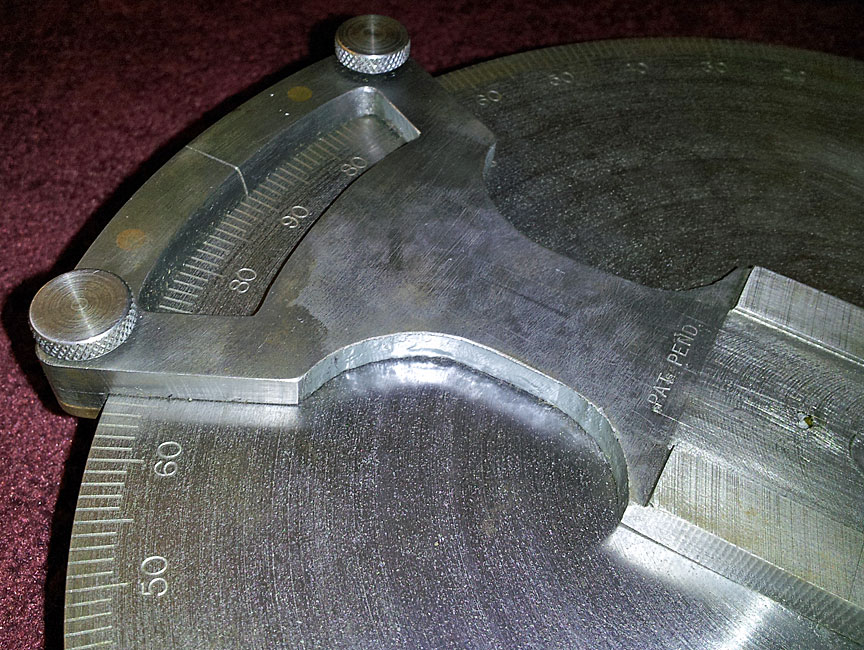
 Notice the degree markings shown in the picture above.
These are engraved using a slotting fitting which can be positioned
anywhere along the arm. It locks into position.
Notice the degree markings shown in the picture above.
These are engraved using a slotting fitting which can be positioned
anywhere along the arm. It locks into position.
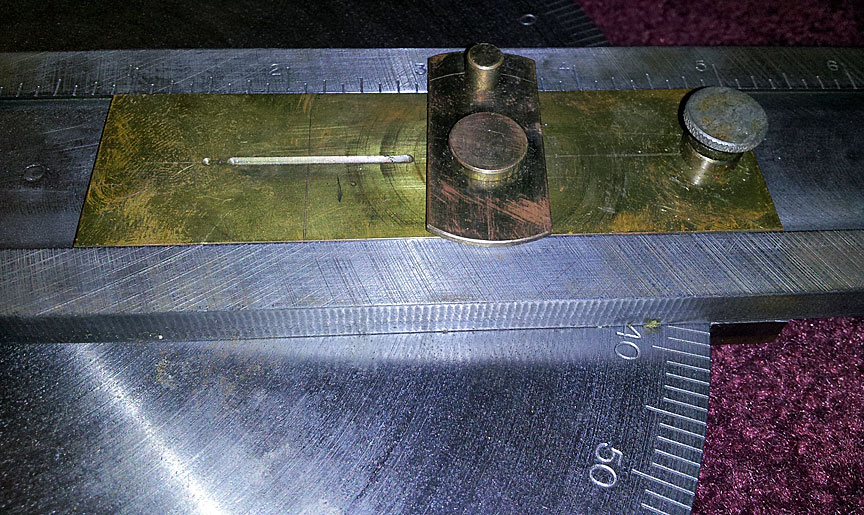
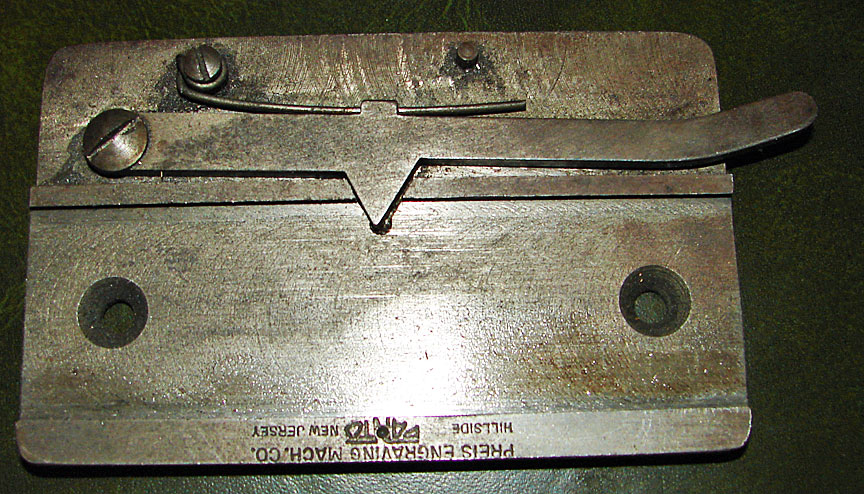
 This slotting fitting has a small pivoting arm which
allows long or short markings to be engraved. This pivoting arm
is in the "short" position in the picture below.
This slotting fitting has a small pivoting arm which
allows long or short markings to be engraved. This pivoting arm
is in the "short" position in the picture below.
 Below is the "long" position for the arm
- exposing more slot for the stylus.
Below is the "long" position for the arm
- exposing more slot for the stylus.
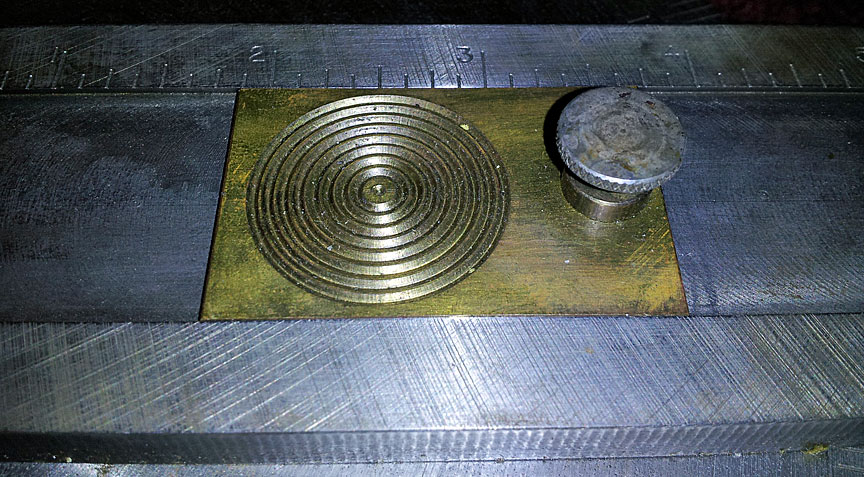
 Sometimes on engravings small circles are desired.
This brass fitting allows this to be quickly done.
Sometimes on engravings small circles are desired.
This brass fitting allows this to be quickly done.
 It should be remembered that the pantograph allows
scaling all of the above to the task at hand.
To make things even more interesting, a cross arm also
attaches to the pivoting long arm. Engravers type fonts fit into
this cross arm. This cross arm will allow engraving the degree
markings in the correct orientation to the degree marking lines.
Words may similarly be engraved at any desired angle.
It should be remembered that the pantograph allows
scaling all of the above to the task at hand.
To make things even more interesting, a cross arm also
attaches to the pivoting long arm. Engravers type fonts fit into
this cross arm. This cross arm will allow engraving the degree
markings in the correct orientation to the degree marking lines.
Words may similarly be engraved at any desired angle.
 Both arms are marked off in inches for centering type.
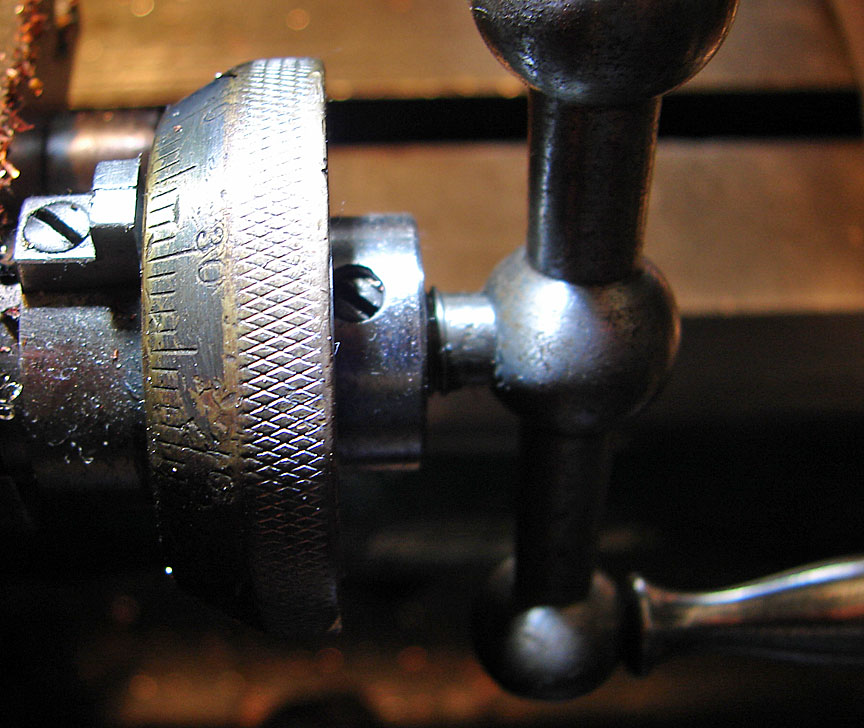
Below is a close up of the degree indicator and locking
thumb screws.
Both arms are marked off in inches for centering type.
Below is a close up of the degree indicator and locking
thumb screws.
 This accessory will come in handy for several upcoming
projects. The first project will be to make new dials on an old
Elgin lathe that I have rebuilt and use quite often.
Here are the dials that I will be replacing.
This accessory will come in handy for several upcoming
projects. The first project will be to make new dials on an old
Elgin lathe that I have rebuilt and use quite often.
Here are the dials that I will be replacing.
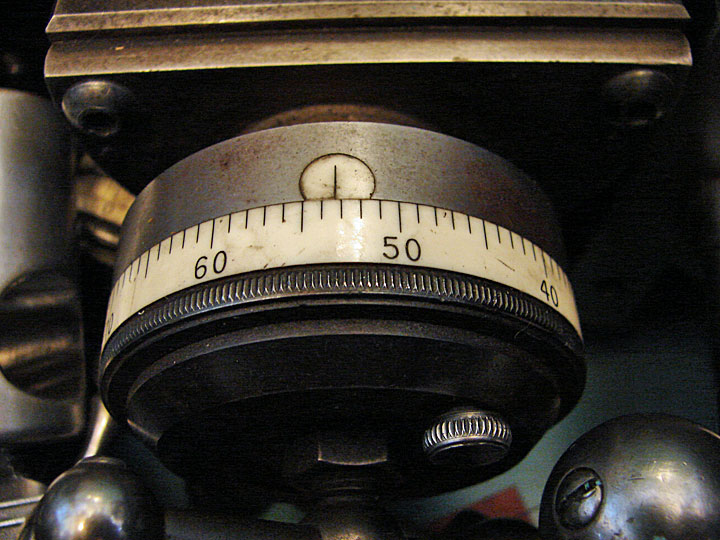
 They are too difficult for my old eyes to quickly read.
The new dials will be of white acetal and resemble the Hardinge
style as seen on another of my lathes. Notice how much easier
these dials are to read.
They are too difficult for my old eyes to quickly read.
The new dials will be of white acetal and resemble the Hardinge
style as seen on another of my lathes. Notice how much easier
these dials are to read.
 To assist in engraving the new dials will be this dividing
or index head.
To assist in engraving the new dials will be this dividing
or index head.
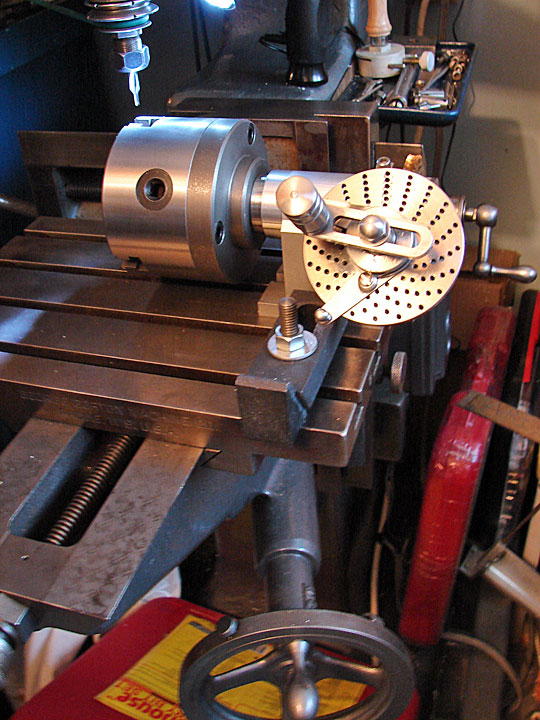 Another view.
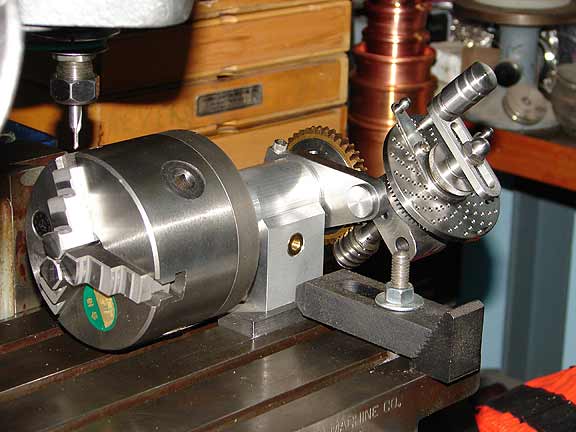 I just clamped it down for this photo. In use, the
dividing head slides clear over to the table edge and the tailstock
support gets mounted at the other end on the pantograph table.
Everything gets centered. The dial to be engraved is mounted on
an arbor which gets chucked securely. The free arbor end is supported
by the tailstock.
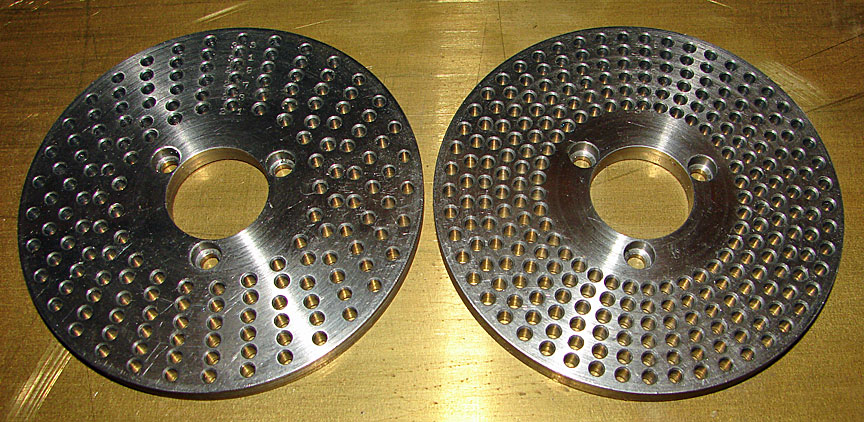
I do have the other two indexing circles to use as
required for the task at hand.
I just clamped it down for this photo. In use, the
dividing head slides clear over to the table edge and the tailstock
support gets mounted at the other end on the pantograph table.
Everything gets centered. The dial to be engraved is mounted on
an arbor which gets chucked securely. The free arbor end is supported
by the tailstock.
I do have the other two indexing circles to use as
required for the task at hand.
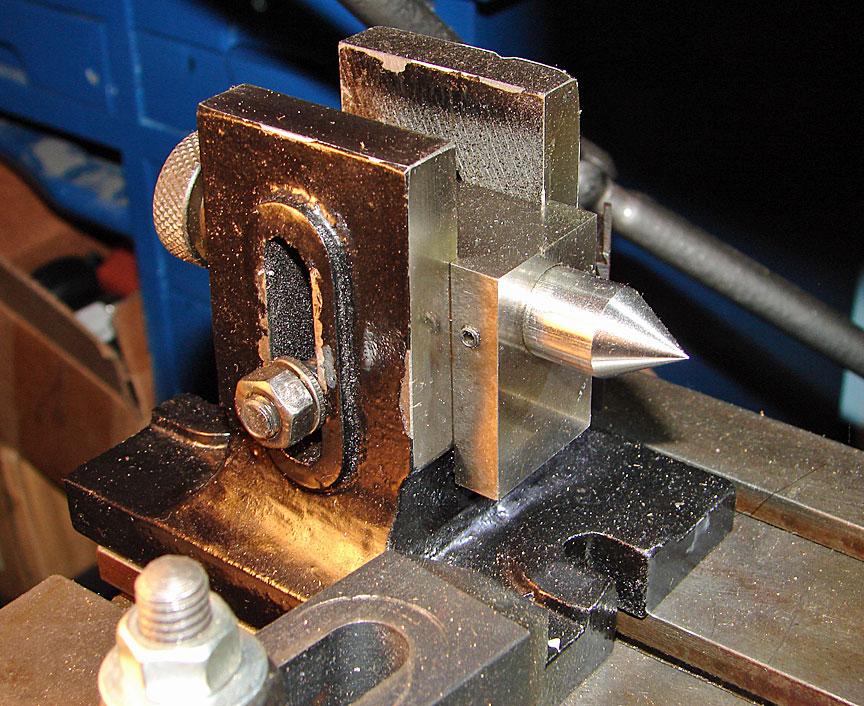
 Below is a picture of the tailstock which supports
the arbor end.
Below is a picture of the tailstock which supports
the arbor end.
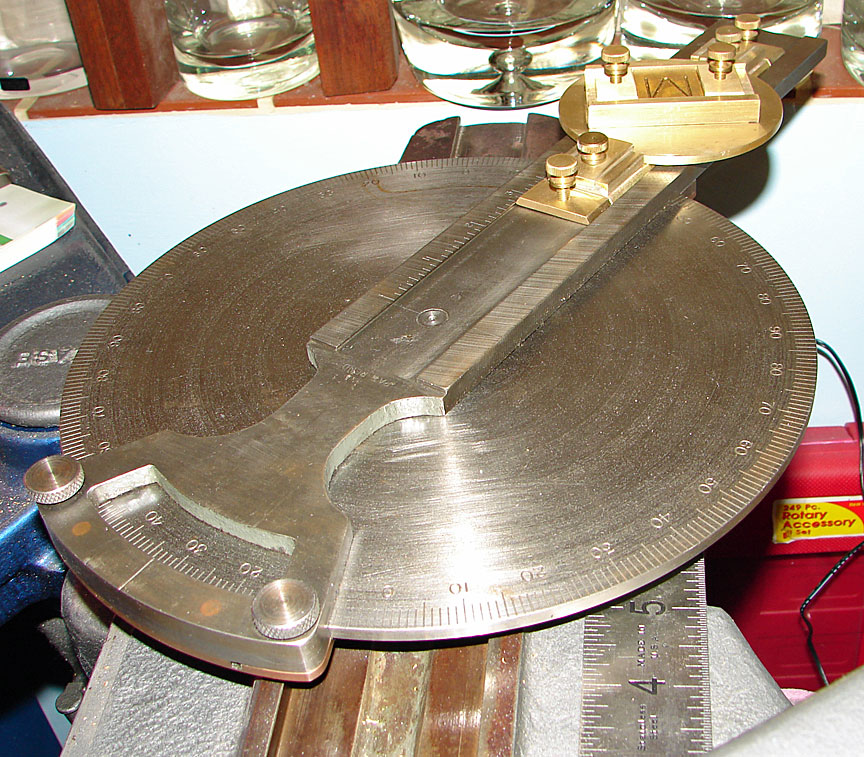
 The new dial engraving accessory has been installed
onto my Gorton 3U.
The new dial engraving accessory has been installed
onto my Gorton 3U.
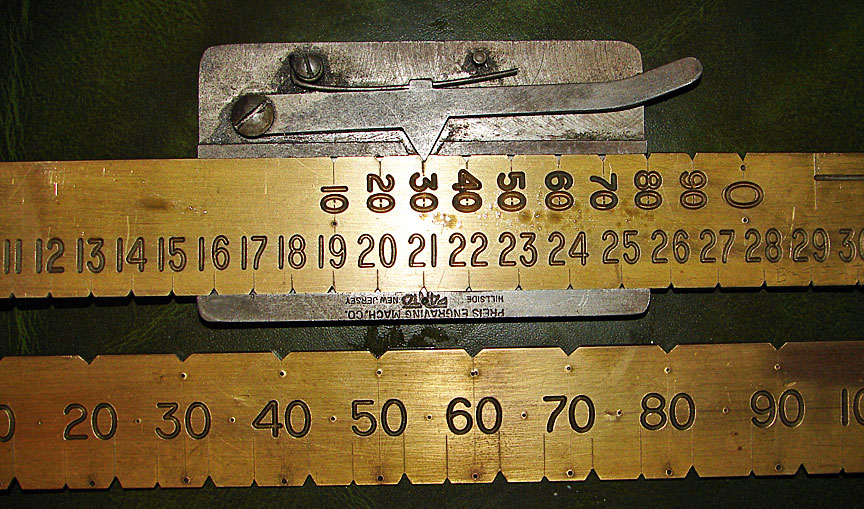
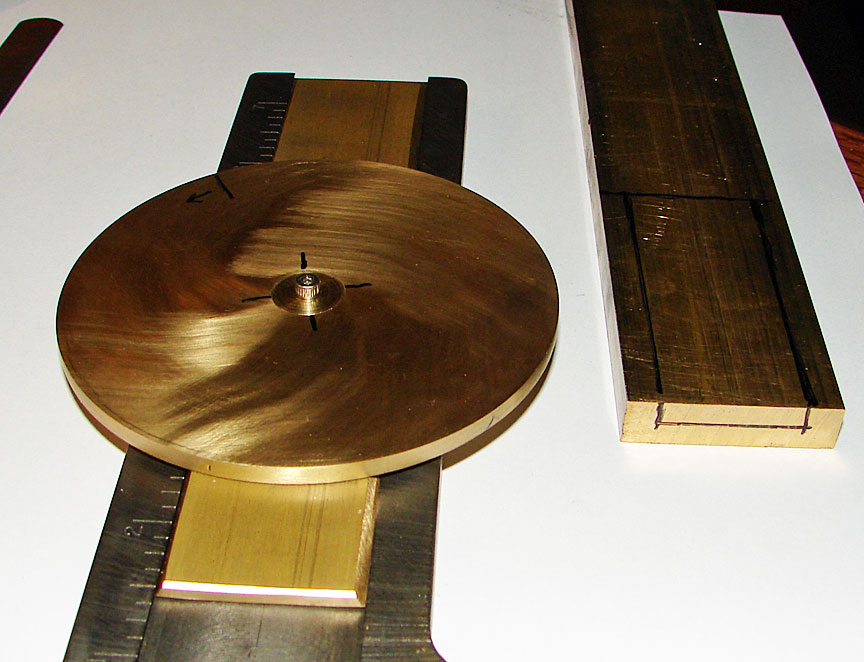
 The Preis company had a nice solution to engraving
the numbers onto a dial. This is the locking positioning attachment
which gets screwed to a copy table.
The Preis company had a nice solution to engraving
the numbers onto a dial. This is the locking positioning attachment
which gets screwed to a copy table.
 In use, notched copy strips were slid along their length
and locked into position as needed. Shown are two differently
oriented notched copy strips along with the Preis positioning
attachment. This is a nice system. Barely seen at the very right
of the below photo is part of a slot for making the degree markings.
There are both long and short slots on these numbr strips.
In use, notched copy strips were slid along their length
and locked into position as needed. Shown are two differently
oriented notched copy strips along with the Preis positioning
attachment. This is a nice system. Barely seen at the very right
of the below photo is part of a slot for making the degree markings.
There are both long and short slots on these numbr strips.
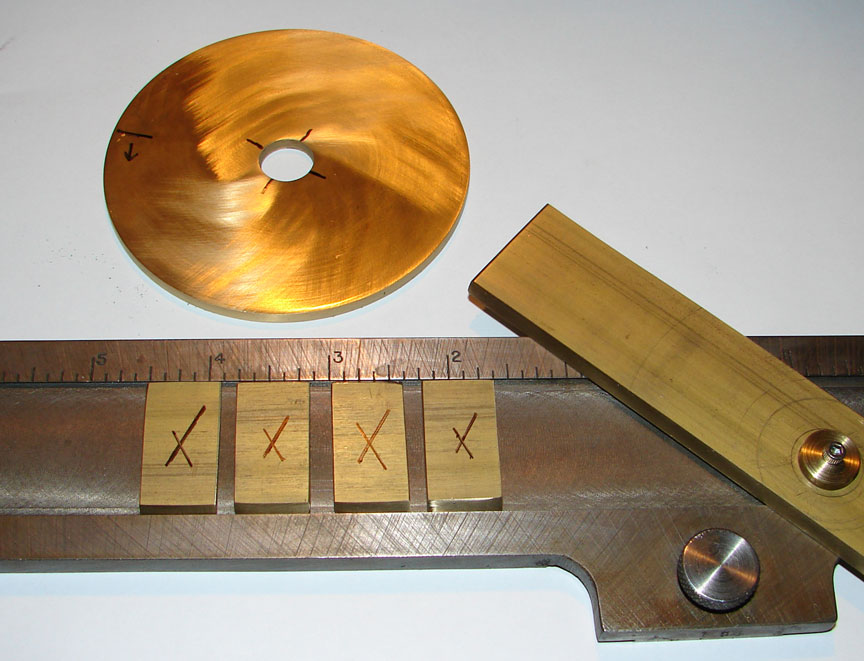
 Alternately these copy strips may be used directly
with the dial engraving accessory. The "V" notch above
the number to be engraved gets centered on the "0" mark
of the graduated scale. The copy strip gets clamped down during
the engraving.
Alternately these copy strips may be used directly
with the dial engraving accessory. The "V" notch above
the number to be engraved gets centered on the "0" mark
of the graduated scale. The copy strip gets clamped down during
the engraving.
 Here are the two quick and easy solutions to getting
numbers on the dials to be engraved. If you look carefully at
the Preis copy strips, you will be able to see the long and short
grooves for engraving the degree lines.
Here are the two quick and easy solutions to getting
numbers on the dials to be engraved. If you look carefully at
the Preis copy strips, you will be able to see the long and short
grooves for engraving the degree lines.
Below will be shown an attachment that I am making
to use with the dial engraving accessary. I will show various
stages of its construction. As it all comes together, things will
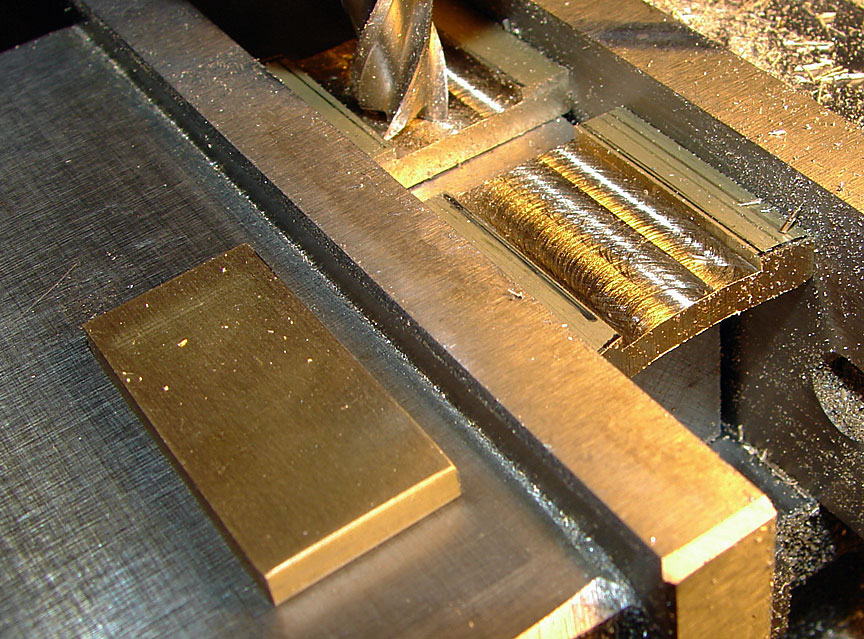
become clearer. The first part to be made was the base plate which
is made to slide into any Gorton 1 1/4" copy holder. Also
made was a 1/2" disc which will serve as the axle for the
new attachment.
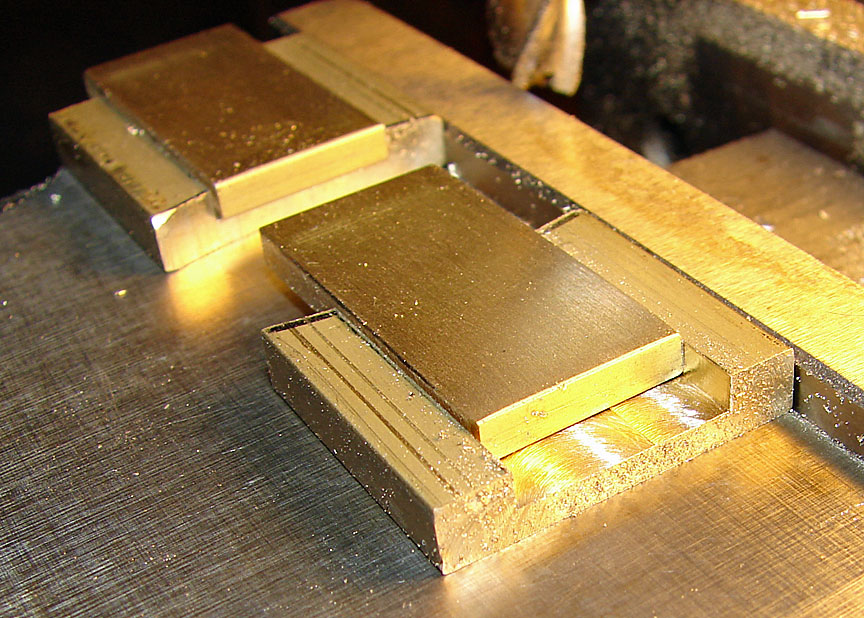
 An 1/8" thick brass disc with a 1/2" center
hole was made. This disc fits onto the 1/2" disc.
To the right in this photo is the rough layut for the
new mini-copy holder for the attachment.This mini-copy holder
will hold standard 1 1/4" type.
An 1/8" thick brass disc with a 1/2" center
hole was made. This disc fits onto the 1/2" disc.
To the right in this photo is the rough layut for the
new mini-copy holder for the attachment.This mini-copy holder
will hold standard 1 1/4" type.
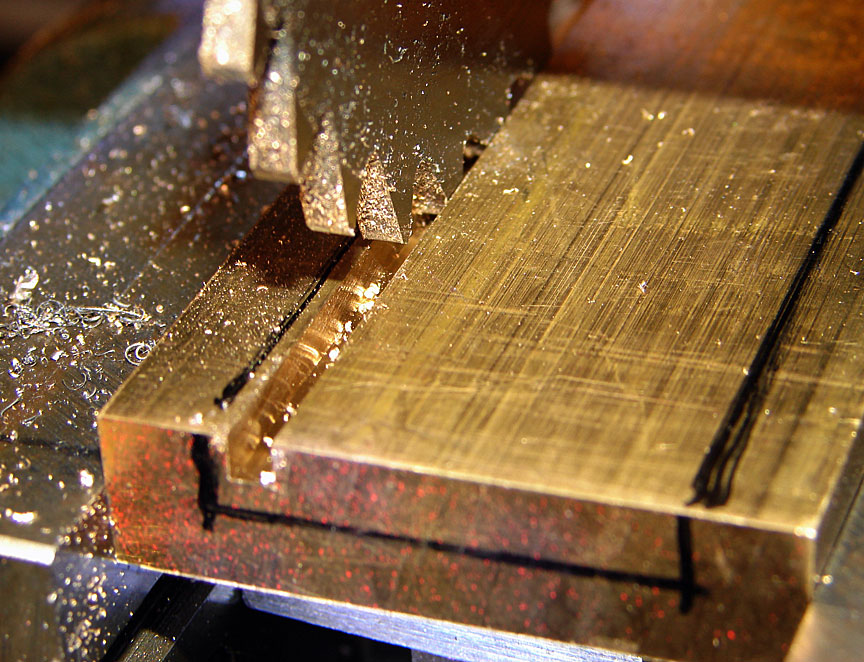
 The recess in the mini-copy holder is cut on a horizontal
mill.
Shown here is the first cut.
The recess in the mini-copy holder is cut on a horizontal
mill.
Shown here is the first cut.
 After a series of cuts, the recess looks like this.
 Several type or copy stops needed to be made.
Here are four blank stops marked for center punching,
drilling, and tapping.
Several type or copy stops needed to be made.
Here are four blank stops marked for center punching,
drilling, and tapping.
 Shown are the four stops completed. Their use will
soon be apparent.
Shown are the four stops completed. Their use will
soon be apparent.
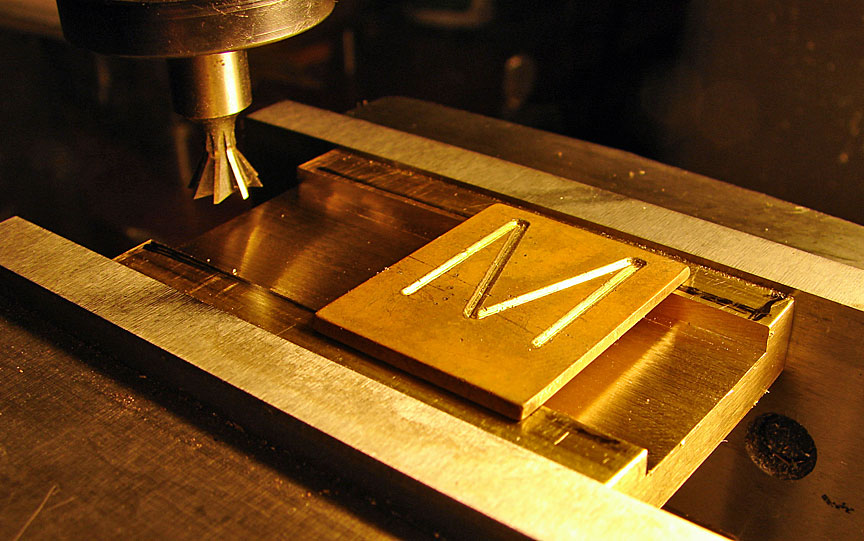
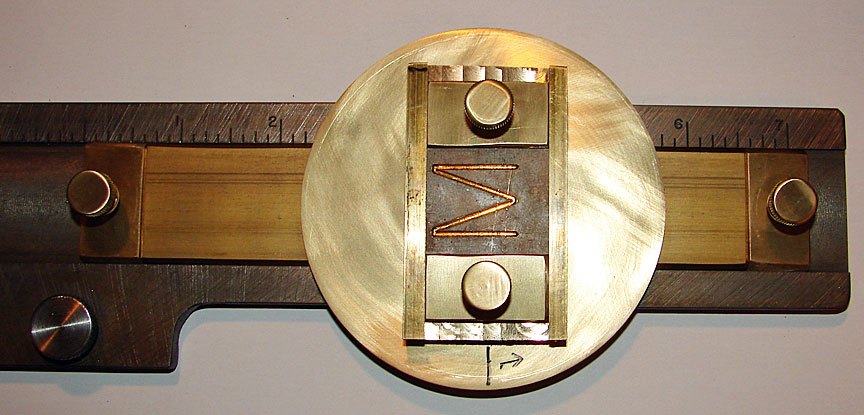
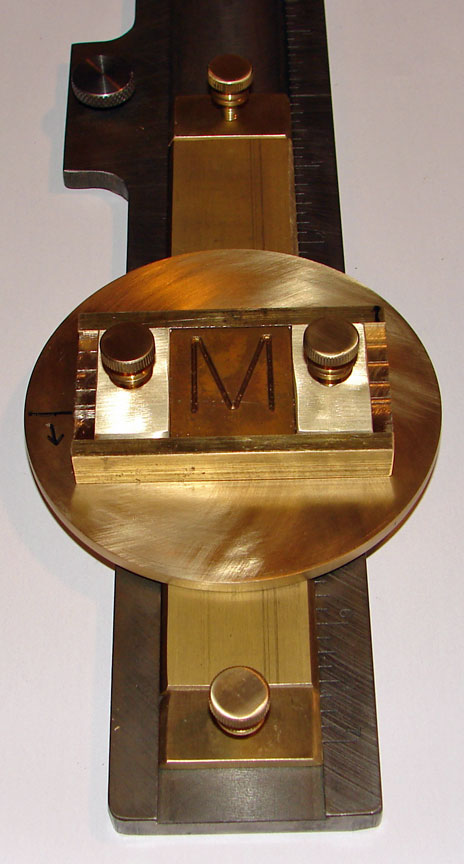
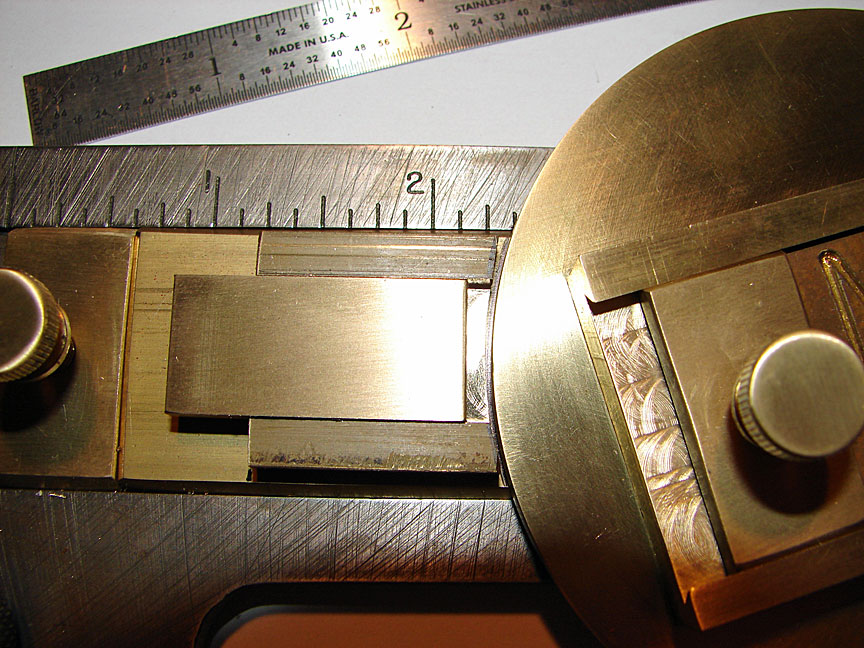
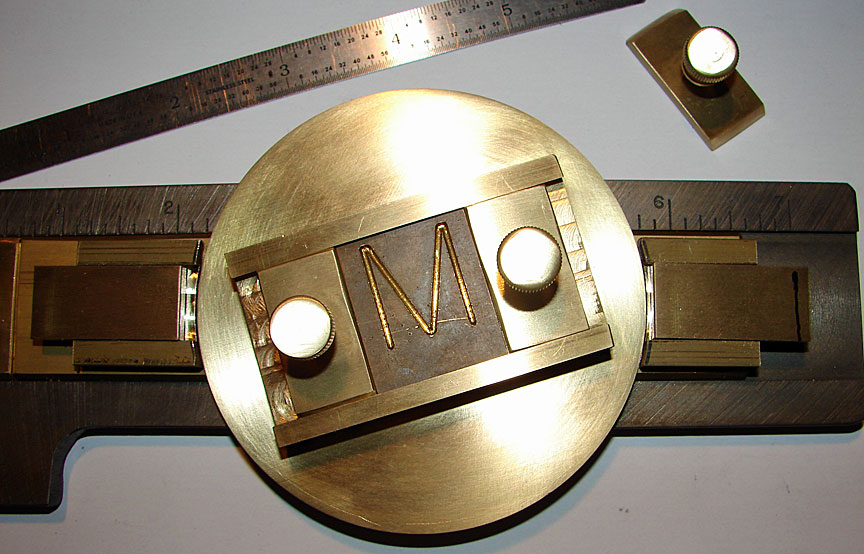
 Things are coming together ... a wide letter (M) is
placed on the mini-copy holder for size and dovetail positioning.
Things are coming together ... a wide letter (M) is
placed on the mini-copy holder for size and dovetail positioning.
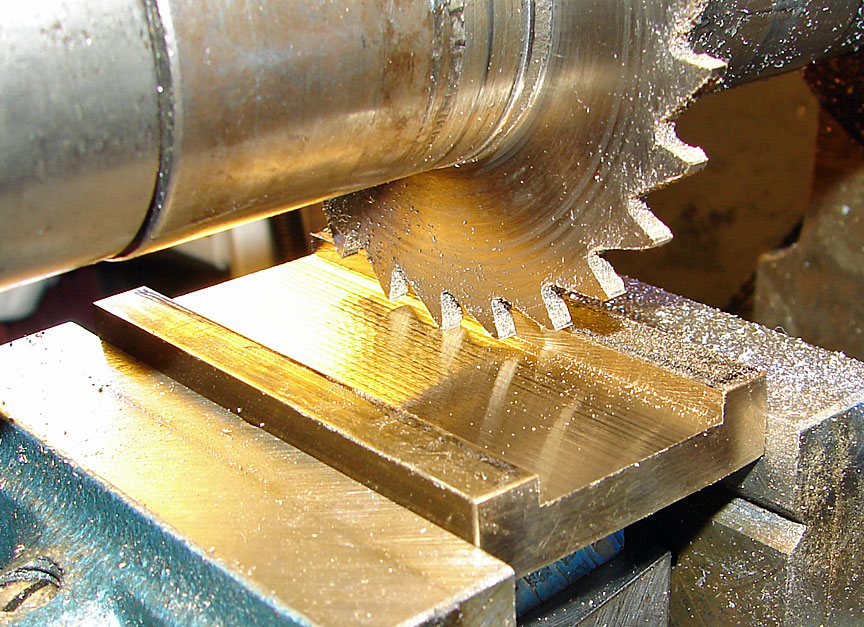
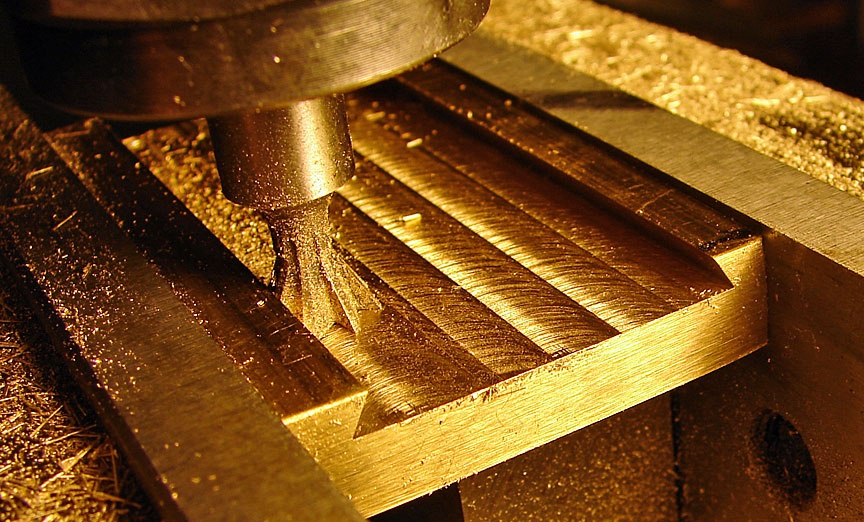
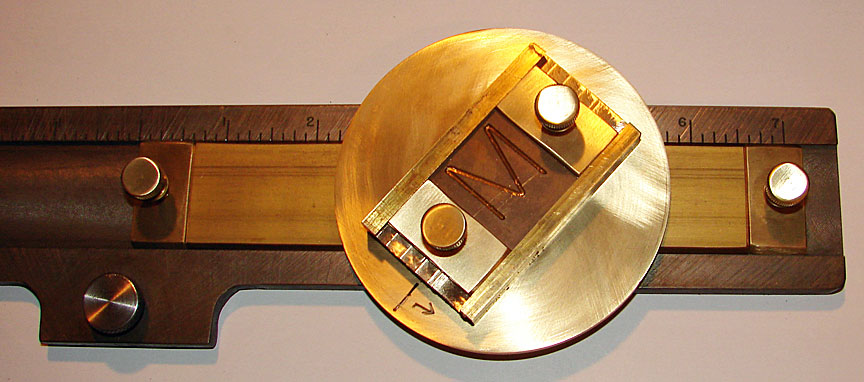
 Machining of the dovetails is begun. Notice the sharp
"V" now on both sides of the recess.
Machining of the dovetails is begun. Notice the sharp
"V" now on both sides of the recess.
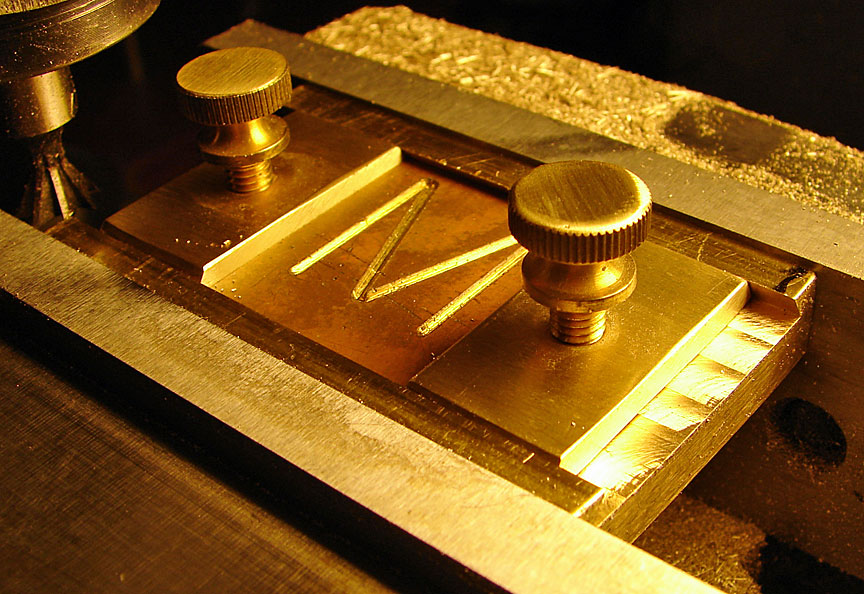
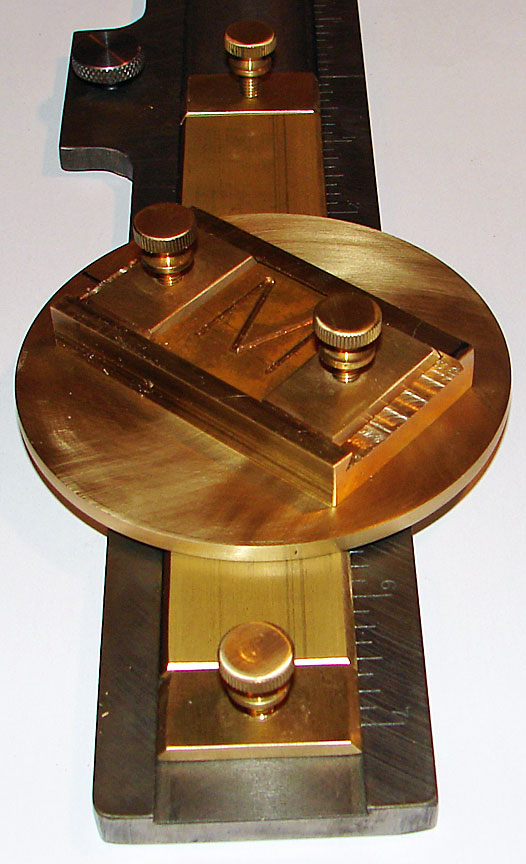
 Two of the newly made type locks can secure any letter
or number desired. If necessary, condensed type may be used for
numbers.
Two of the newly made type locks can secure any letter
or number desired. If necessary, condensed type may be used for
numbers.
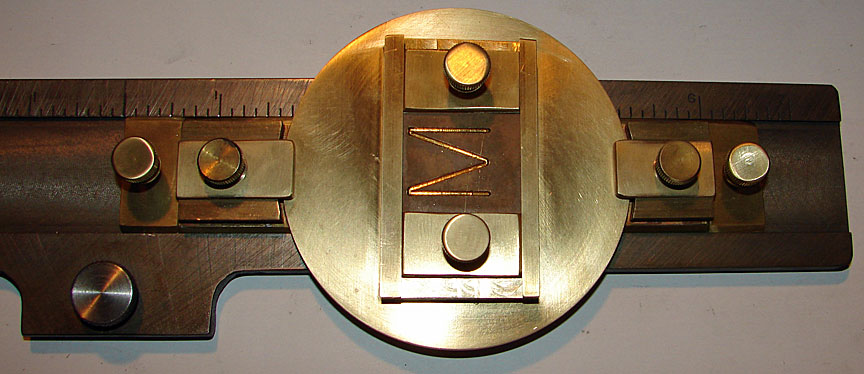
 Below parts are partially assembled to demonstrate
what I am making here.
Below parts are partially assembled to demonstrate
what I am making here.
 Another view ...
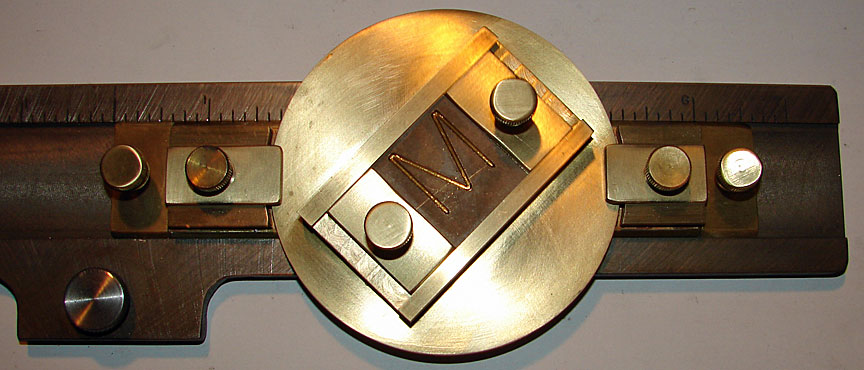
 The power of this attachment to the dial engraving
accessory becomes apparent when it is seen that this copy can
be rotated (and soon locked in position). This allows making clock
dials or faces with all of the numbers upright.
The power of this attachment to the dial engraving
accessory becomes apparent when it is seen that this copy can
be rotated (and soon locked in position). This allows making clock
dials or faces with all of the numbers upright.
 Another view ...
 The next thing to make is a brake system to secure
this rotating mini-copyholder. A couple brake supports were cut
and then filed to the required curvature on my die filer.
The next thing to make is a brake system to secure
this rotating mini-copyholder. A couple brake supports were cut
and then filed to the required curvature on my die filer.
 A slot for the brake pads was milled in both brake
supports. One of the brass brake pads is shown at the left and
the slots being milled on the right. The slots are milled to just
barely allow the brake pad to slide back and forth.
A slot for the brake pads was milled in both brake
supports. One of the brass brake pads is shown at the left and
the slots being milled on the right. The slots are milled to just
barely allow the brake pad to slide back and forth.
 Below are the two brake pads slid into the brake supports
for a test fit. The brake pads were machined to be the same widths.
Below are the two brake pads slid into the brake supports
for a test fit. The brake pads were machined to be the same widths.
 Here is a close up of the left brake support with its
curved end and brake pad in the slot.
Here is a close up of the left brake support with its
curved end and brake pad in the slot.
 The right side also has a brake assembly.
 Here is what things look like before adding the tightening
thumb screws.
Here is what things look like before adding the tightening
thumb screws.
 The completed attachment is shown below. Thumb screws
now tighten the brakes securing the rotating disc in any position.
The completed attachment is shown below. Thumb screws
now tighten the brakes securing the rotating disc in any position.
 The rotating mini-copyholder with its type can now
be used for engraving.
The rotating mini-copyholder with its type can now
be used for engraving.
 Below the completed attachment is shown installed on
the dial engraving accessory. If you can not visualize how this
could be utilized, perhaps you need to stick to engraving trophys.
Note that this new little accessory may be used with standard
1 1/4" type holders.
Below the completed attachment is shown installed on
the dial engraving accessory. If you can not visualize how this
could be utilized, perhaps you need to stick to engraving trophys.
Note that this new little accessory may be used with standard
1 1/4" type holders.
 And below is a close up photo.
 Everything is now ready for the tasks at hand.
Click here to see how I use
the master type strips.
Click here to return to the
previous page.
Click here to see
info on my Preis Panto-Grinder
Click here to go to my Gorton
265 grinder page.
Everything is now ready for the tasks at hand.
Click here to see how I use
the master type strips.
Click here to return to the
previous page.
Click here to see
info on my Preis Panto-Grinder
Click here to go to my Gorton
265 grinder page.